🛒 Best Price Today on Amazon
Prime members get fast, free shipping on everything above, plus member-only deals. New members get a 30-day free trial — cancel anytime.
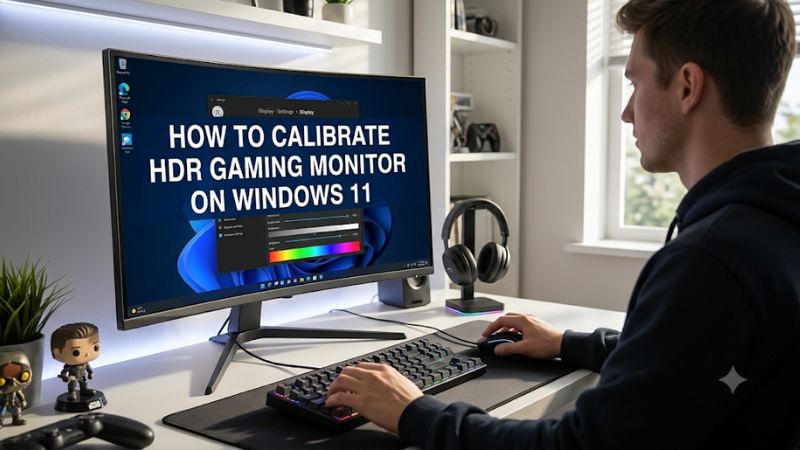
How to calibrate HDR gaming monitor on Windows 11 is an important step toward getting more accurate brightness, contrast, and color in supported games. Windows provides a dedicated HDR Calibration app that helps configure black levels, highlight brightness, and color saturation. This guide explains the prerequisites, calibration process, and settings to check afterward.
What HDR Monitor Calibration Really Comes Down To
HDR calibration on Windows 11 involves matching the operating system’s output to the actual capabilities of your monitor. The goal is to preserve shadow detail, display bright highlights without unnecessary clipping, and maintain natural-looking colors. Calibration cannot add brightness or contrast capabilities that the physical panel does not have.
1. Understand Your Monitor’s HDR Capabilities
Before changing settings, check whether your monitor supports HDR gaming rather than simply accepting an HDR signal. Open Settings > System > Display > HDR and select the correct display. Under Display capabilities, look for confirmation that HDR games, apps, and other content are supported.
Monitor specifications also matter. Look for the supported HDR format, peak brightness, contrast characteristics, local dimming capability, and color gamut. DisplayHDR certification can provide additional information about performance, but an HDR label alone does not establish how well a monitor handles highlights or dark scenes.
2. Understand the Three Main Calibration Targets
The Windows HDR Calibration app uses three test patterns to help establish the display’s black level, highlight detail threshold, and maximum brightness. These measurements influence how HDR content is mapped to the monitor’s available luminance range.
Black-level calibration helps preserve details in dark scenes, while highlight calibration helps prevent bright objects from losing visible detail. The maximum brightness pattern establishes the upper brightness limit used by the calibration process. These settings should reflect what the display can actually reproduce.
3. Separate Windows Calibration From Game Calibration
Windows calibration establishes display-related HDR parameters, but individual games can have their own HDR brightness, paper-white, and peak-luminance controls. These settings serve different purposes and should not automatically be assigned identical values.
A game may use its own HDR implementation, so a calibration profile does not ensure that every title will produce the same image. For the best consistency, calibrate Windows first, then configure each game’s HDR options according to its instructions and visible test patterns.
What Doesn’t Help
Increasing every brightness and saturation slider does not necessarily improve HDR. Excessive brightness can hide shadow detail or make SDR applications uncomfortable, while excessive saturation can produce unnatural colors.
Likewise, selecting the highest brightness value simply because it appears more impressive is not a reliable calibration method. The objective is to preserve visible detail across the brightness range, not to make every scene look brighter.
How to Calibrate HDR Gaming Monitor on Windows 11: Step by Step
The most reliable starting point is to enable HDR, confirm that Windows recognizes the monitor correctly, and run Microsoft’s Windows HDR Calibration app. Complete the process with the monitor’s on-screen display settings and individual game adjustments. Keep the original monitor settings available so you can reverse changes if the picture becomes worse.
1. Enable HDR and Check Display Compatibility
First, connect your monitor using a compatible DisplayPort or HDMI connection. Make sure the monitor’s own HDR mode is enabled through its on-screen display (OSD) menu if the manufacturer requires it. Select the appropriate input and picture mode before adjusting Windows.
In Windows 11, open Settings > System > Display > HDR. Select your HDR monitor if multiple displays are connected, then check Display capabilities. Enable Use HDR if supported. If Windows reports that HDR games and apps are not supported, investigate the connection, display configuration, graphics driver, and monitor specifications before continuing.
2. Prepare the Monitor and Graphics Driver
Update your graphics driver through NVIDIA, AMD, Intel, or your computer manufacturer’s official support channel. Microsoft’s HDR Calibration app requires a compatible display driver, with WDDM 2.7 or later specified in its requirements. Restart Windows if a driver installation requires it.
Next, open the monitor’s OSD and review its HDR picture mode, local dimming, contrast enhancement, dynamic contrast, and other image-processing options. Avoid stacking unnecessary enhancement effects during calibration. Some post-processing features can interfere with the calibration patterns, so use a relatively neutral HDR picture mode.
3. Run the Windows HDR Calibration App
Download Windows HDR Calibration from the Microsoft Store. Before launching it, make sure HDR is enabled and that the application is displayed on the monitor you want to calibrate. If you use multiple screens, select the correct display in Windows and move the app to that screen.
Open Start, select All apps, and launch Windows HDR Calibration. The application must run full-screen. Select Get started and follow the three luminance patterns, adjusting each slider according to the instructions. Microsoft designed these patterns to establish the darkest visible detail, brightest visible detail, and maximum full-screen brightness.
Microsoft Support+1
4. Save the Profile and Adjust Color Saturation
After the luminance patterns, the app provides a color saturation adjustment. Start with the default position and increase saturation only if the image looks noticeably undersaturated. Excessive adjustment can make game environments, skin tones, and colored lighting look artificial.
Complete the application and save the resulting profile. Give it a recognizable name if Windows requests one. If you replace the monitor or substantially change the display configuration, run calibration again. Microsoft also provides a way to remove a profile through Control Panel > Color Management > All Profiles if you need to revert.
Microsoft Support+1
Windows 11 HDR Calibration Settings at a Glance
The following table summarizes the main adjustments, where to find them, and what to watch for.
| Setting or Step | Where | Effect | Risk |
| Use HDR | Settings > System > Display > HDR | Enables Windows HDR output | SDR desktop may look different |
| Minimum luminance | Windows HDR Calibration app | Establishes the visible black-level threshold | Incorrect adjustment can crush shadow detail |
| Maximum luminance | Windows HDR Calibration app | Sets the highlight brightness threshold | Incorrect values can clip highlights |
| Maximum full-frame luminance | Windows HDR Calibration app | Sets the full-screen brightness limit | Incorrect values can affect overall tone mapping |
| Color saturation | Windows HDR Calibration app | Adjusts perceived color intensity | Excessive saturation looks unnatural |
| SDR content brightness | Settings > System > Display > HDR | Balances SDR brightness while HDR is enabled | Too high or low can make desktop content uncomfortable |
Understanding the Calibration Patterns
Minimum luminance: Adjust the first pattern until the darkest visible test detail reaches the disappearance point described by the application. Avoid guessing based on how black the entire screen looks. The objective is to retain dark-scene detail without unnecessarily raising the black level.
Maximum luminance: The second pattern helps establish the display’s brightest visible details. Watch the test pattern carefully and follow its instructions. If your monitor has its own tone-mapping behavior, the app’s visual threshold may not always correspond perfectly to the display’s actual luminance capability.
Maximum full-frame luminance: The third pattern addresses how bright the display can become when a large portion of the screen is illuminated. This matters because a monitor may produce bright small highlights but reduce brightness across a predominantly white or bright scene.
Color saturation: The final adjustment is optional. A restrained setting is generally a sensible starting point, particularly if your monitor already has a wide color gamut. Calibration should preserve natural-looking colors rather than exaggerate them.
One important qualification is that monitors with aggressive internal tone mapping may not behave exactly as the app’s simple visual instructions imply. RTINGS explains that some displays roll off highlights gradually, meaning blindly pushing sliders until patterns disappear can produce inaccurate source-to-display tone mapping. Where reliable measured luminance data is available, use it to inform the adjustment rather than assuming every monitor behaves identically.
RTINGS.com+1
FAQ
1. Do I Need the Windows HDR Calibration App for Every Gaming Monitor?
No, calibration is not mandatory for every HDR monitor. Some certified displays already provide suitable HDR behavior with their factory settings. However, the Windows HDR Calibration app can help establish display-specific luminance and color settings, particularly when Windows produces washed-out highlights or loses shadow detail.
2. Should I Leave HDR Enabled All the Time in Windows 11?
Not necessarily. You can enable HDR when playing supported HDR games and disable it when using applications that look better in SDR. Windows also provides the keyboard shortcut Windows + Alt + B to switch HDR on or off on supported systems.
If you prefer keeping HDR enabled, adjust the SDR content brightness slider under Settings > System > Display > HDR. This controls the relative appearance of SDR content on an external HDR display.
Microsoft Support+1
3. Why Does My HDR Gaming Monitor Look Washed Out After Calibration?
A washed-out image can result from incorrect monitor picture settings, excessive SDR brightness, unsupported HDR configurations, or inaccurate tone mapping. Check that HDR is enabled in both Windows and the monitor’s OSD, then review the calibration profile and game-specific HDR settings.
Also check whether contrast enhancement or other monitor processing is interfering with the picture. If necessary, restore the previous profile and repeat calibration using the monitor’s recommended HDR mode.
4. Should I Enable Auto HDR After Calibrating My Monitor?
Auto HDR is optional and is intended for compatible DirectX 11 and DirectX 12 games that were originally designed for SDR. It is not necessary for games that already provide native HDR support.
To enable it, open Settings > System > Display, select your HDR display, expand the HDR options, and turn on Auto HDR. You can also adjust its intensity through Xbox Game Bar by pressing Windows + G and opening Settings > Gaming features.
Microsoft Windows+1
Final Thoughts
Learning how to calibrate HDR gaming monitor on Windows 11 helps you establish more appropriate brightness, contrast, and color settings for supported games. Start with Microsoft’s calibration app, check your monitor’s tone mapping, and adjust individual game settings afterward. Prioritize preserved image detail over exaggerated brightness or saturation.