🛒 Best Price Today on Amazon
Prime members get fast, free shipping on everything above, plus member-only deals. New members get a 30-day free trial — cancel anytime.
Selecting hardware requires clear facts regarding switch mechanics, response latency, and key actuation depth. This mechanical keyboard guide breaks down essential hardware parameters for Windows users demanding reliable peripheral input. Understanding how signal processing interacts with physical switches helps optimize system setup.
What Mechanical Keyboard Performance Really Comes Down To
Quick answer: Mechanical keyboard responsiveness depends on switch actuation distance, polling frequency, and USB controller debouncing. Reading this comprehensive mechanical keyboard guide clarifies how analog Hall Effect sensors differ from classic metallic contact points. Modern mainboards running Windows 11 process input interrupts best when USB polling matches display refresh rates.
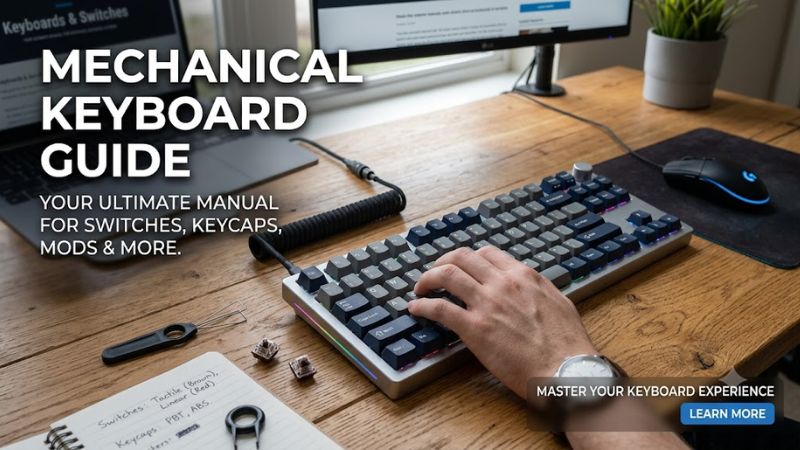
Switch Actuation and Rapid Trigger Dynamics
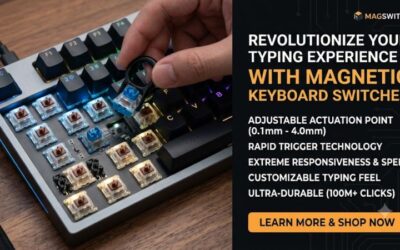
Mechanical switches register inputs when contacts connect or magnetic sensors detect distance changes. Standard switches require 2.0mm actuation travel with 4.0mm total travel, while Hall Effect switches allow custom actuation points between 0.1mm and 4.0mm. Referencing a mechanical keyboard guide helps users set these precise values.
Rapid Trigger technology dynamically resets key states instantly when physical movement reverses direction. Instead of waiting for a switch to cross a fixed reset point, the sensor measures upward movement as small as 0.1mm to deactivate the key. This dynamic reset speeds up counter-strafing inputs in competitive shooter titles running at 240Hz.
USB Polling Rates and Controller Latency
Signal transmission relies on the microcontroller unit processing matrix scans and sending USB packets to the operating system. Standard gaming peripherals poll at 1000Hz to report input events every 1.0ms, whereas advanced controllers support 8000Hz polling for 0.125ms update intervals. Higher polling reduces input latency across high-refresh displays.
Maintaining high polling rates demands processing capacity from system hardware and motherboard controllers. USB host controllers assign CPU interrupts for every packet received, which increases system overhead on older processors like Intel 8th Gen architecture. Using dedicated USB 3.2 ports avoids bandwidth congestion caused by sharing hubs with high-data devices.
Mounting Styles and Acoustic Dampening
Internal case architecture dictates keypress feel, vibration transfer, and acoustic signature. Tray-mounted designs screw the printed circuit board directly to the bottom chassis, resulting in a rigid typing surface. Gasket mounts suspend the plate using silicone or foam tabs, absorbing impact forces and softening bottom-out feeling for long gaming sessions.
Acoustic dampening materials like Poron foam, IXPE switch pads, and silicone sheets modify high-frequency clack into deeper sound profiles. Sound damping does not alter electrical signal processing or key actuation speed, but dampening layers cut internal shell echo. High quality dampening materials also stabilize hot-swap switch sockets against physical flex.
What Doesn’t Help Performance
Modifying software settings like Windows mouse acceleration or registry input flags does not alter hardware key response times. System registry tweaks claiming to reduce input delay often introduce system instability without modifying the USB host protocol. True latency reduction stems from physical switch selection, MCU processing speed, and polling configurations.
Applying excessive lubricant to switch stems or stabilizers causes sluggish key return rather than faster actuation. Heavy grease builds up inside the housing, increasing mechanical resistance and slowing physical switch resets. Maintaining factory switch tolerances or applying micro-thin layers of Krytox 205g0 ensures optimal movement without key sticking.
How to Configure Mechanical Keyboard Settings: Step by Step
Configuring hardware parameters requires accessing device software or browser web configurators like VIA. Following this mechanical keyboard guide ensures stable latency reductions while preventing key chattering. Modern controllers save configuration profiles directly to onboard flash memory, allowing custom settings to persist across rebooting Windows 11.
| Setting | Where | Effect | Risk |
| Polling Rate | Vendor Software / Web App | Reduces packet intervals from 1.0ms to 0.125ms | Higher CPU interrupt load on older processors |
| Debounce Delay | VIA / Firmware Settings | Filters out mechanical contact chatter and double clicks | Setting below 1ms causes key double-typing |
| Actuation Point | Magnetic Switch Software | Shortens physical key travel required for signal input | Ultra-sensitive settings trigger accidental keypresses |
| Firmware Flash | QMK Configurator / Vendor Utility | Updates USB protocol stack and resolves controller bugs | Cable disconnect during flash corrupts PCB firmware |
Step 1: Adjust USB Polling Rate to 1000Hz
Open your peripheral manufacturer software or web configurator and navigate to the performance settings tab. Select a polling rate of 1000Hz to ensure the MCU sends key status updates to Windows every single millisecond. Higher polling options like 8000Hz require USB 3.2 ports and capable CPU hardware to prevent frame drops in games.
To verify polling rate performance, monitor CPU usage in Task Manager while typing rapidly. If system performance stutters or frame rates drop on 8000Hz mode, revert the polling rate back to 1000Hz in the software panel. Reverting to standard 1000Hz immediately reduces background CPU interrupt load back to less than 1 percent.
Step 2: Set Optimal Debounce Time in Firmware
Access the debounce menu within VIA or your dedicated keyboard setup software to adjust contact filtering delay. Lowering debounce time from default 10ms down to 2ms or 3ms reduces input lag on standard mechanical switches. Following advice from a mechanical keyboard guide prevents setting value too low, which leads to unwanted key double-presses.
Verify input stability by opening a text editor and typing fast key sequences to check for repeated characters. If chattering occurs, increase debounce time in 1ms increments until chatter vanishes completely. Increasing the value back to 5ms restores switch stability if mechanical contact leaves develop wear over long usage periods.
Step 3: Calibrate Magnetic Switch Actuation Point
For magnetic Hall Effect models, launch the configuration utility and select the actuation distance menu. Adjust individual key actuation points between 0.1mm for twitch reflexes and 2.0mm for standard typing tasks. Custom actuation heights allow fast key actuation on movement keys while keeping ability keys at default depth to stop accidental fires.
Test actuation settings in game training grounds to confirm movement keys respond immediately without resting-finger triggers. If unintended movement occurs, increase actuation depth to 1.0mm or 1.5mm on affected keys. Resetting values back to factory default 2.0mm restores standard mechanical movement distance whenever calibration is needed.
Step 4: Update Firmware via QMK Configurator
Download the latest firmware binary file for your specific PCB model from the official manufacturer repository. Open QMK Toolbox or vendor flashing tool, select your specific firmware image file, and place the keyboard into bootloader mode by holding down the reset button or pressing Escape while connecting the USB cable to your system.
Click Flash in the software and wait for the process completion message before disconnecting the hardware. Verify layout functionality using a web key tester to ensure every layer registers input cleanly. If firmware corruption occurs, re-enter bootloader mode and re-flash the factory default firmware binary to restore full default function.
Frequently Asked Questions
Addressing common questions regarding peripheral setups helps users choose components suited to gaming preferences. This mechanical keyboard guide provides verified responses to technical inquiries about switch mechanics, polling benefits, and noise dampening. Understanding these hardware principles ensures informed purchasing and tuning decisions.
How Do You Choose Between Linear and Tactile Switches?
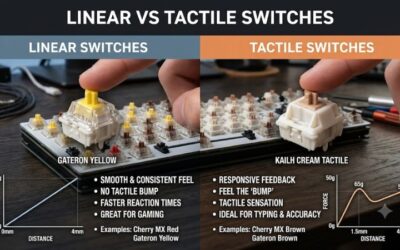
Choose linear switches for smooth keypresses without tactile bumps, or tactile switches if you require physical force feedback at actuation. Linear switches provide uninterrupted vertical travel preferred in fast-paced FPS titles like Valorant. Consult this mechanical keyboard guide when picking spring weights, as 45g linear springs offer quick rapid input options.
Tactile switches offer a distinct tactile bump around 1.5mm depth to notify users that actuation occurred. This bump prevents accidental key presses during typing sessions or complex tactical games requiring precise key entries. Choosing between the two depends on whether immediate speed or physical feedback fits your gaming workflow.
Does an 8000Hz Polling Rate Improve Gaming Latency?
An 8000Hz polling rate reduces input latency from 1.0ms down to 0.125ms, providing faster signal transmission to compatible high-refresh monitors. Competitive players on 240Hz or 360Hz displays notice smoother input delivery during fast actions. However, system processors must handle increased USB interrupt calls without dropping game frame rates.
For general gaming on 60Hz or 144Hz monitors, standard 1000Hz polling offers latency performance indistinguishable from higher values. Setting high polling on older hardware can consume CPU cycles needed for game rendering. Unless paired with high-end CPUs and high-refresh displays, 1000Hz remains the most stable setup for gaming.
What Is the Difference Between Mechanical and Optical Switches?
Optical switches break an infrared light beam to actuate, whereas mechanical switches register inputs using physical metal leaves. Optical switches bypass metal debouncing delays because signal disruption happens instantly when the stem block blocks light. This lack of physical contact points reduces internal switch wear and increases lifespan.
Optical switch boards require compatible PCB light sensors, meaning standard MX mechanical switches cannot swap into optical sockets. While optical actuation delivers low signal delay, modern magnetic Hall Effect switches match optical speed while offering adjustable actuation distances between 0.1mm and 4.0mm directly in software.
How Can You Reduce Keyboard Noise Without Custom Oils?
You can lower keyboard noise without oils by installing sound-absorbing foam inside the chassis and placing a thick desk mat under the board. Adding Poron plate foam absorbs hollow resonance inside plastic or aluminum cases during fast typing. A dense desk mat absorbs impact vibrations before sound transfers into desktop surfaces.
Swapping default ABS keycaps for thick PBT keycaps also deepens sound signatures and cuts high-pitched top-out clack. Installing rubber O-rings around keycap stems dampens bottom-out noise, though O-rings reduce key travel distance by 0.2mm. Using pre-lubricated switches from factory production offers quiet operation without messy assembly.
Final Thoughts
Optimizing peripheral performance comes down to selecting suitable switches, tuning debounce rates, and matching USB polling to system capabilities. Following this mechanical keyboard guide allows users to balance low latency with long-term hardware reliability. Adjusting settings step by step ensures smooth control across every PC game session.
Ready to decide? Our #1 pick for 2026 is the Setting.
Live price & availability on Amazon.