🛒 Best Price Today on Amazon
Prime members get fast, free shipping on everything above, plus member-only deals. New members get a 30-day free trial — cancel anytime.
Knowing how to check what motherboard you have helps you identify CPU compatibility, supported memory, storage options, and the correct BIOS update. Windows includes built-in tools that can reveal your board model without opening the PC case. If software returns incomplete information, PowerShell, BIOS, and physical markings provide additional ways to confirm it.
Quick answer: Our top pick in 2026 is the Setting — our #1 rated choice. See the full ranked comparison, alternatives and buying advice below.
What Motherboard Identification Really Comes Down To
The quickest approach is to open System Information with msinfo32 and inspect the BaseBoard Manufacturer and BaseBoard Product fields. These identify the board maker and its reported model on many Windows PCs. If either field is blank or generic, use another identification method before downloading firmware or purchasing replacement components.
Find the Manufacturer and Model in Windows
Press Windows + R, enter msinfo32, and press Enter. In System Information, select System Summary if necessary, then locate BaseBoard Manufacturer, BaseBoard Product, and BaseBoard Version. Record the values exactly as displayed, including suffixes, revision numbers, and model identifiers.
Do not confuse System Manufacturer or System Model with the motherboard fields. Those entries often identify a prebuilt desktop or laptop rather than the board itself. If you see a generic value such as “To Be Filled By O.E.M.,” Windows may not have received useful identification data from the firmware.
Understand the Difference Between Board and PC Models
A desktop sold by Dell, HP, Lenovo, or another system manufacturer may use a proprietary motherboard with a part number different from the computer’s retail model. Searching the PC’s model number can help locate official service documentation, but it does not always reveal the exact board revision installed in your machine.
Custom-built PCs usually have a retail motherboard model, such as a product from ASUS, MSI, Gigabyte, or ASRock. The manufacturer’s product page and support documentation can then confirm the socket, chipset, memory type, firmware downloads, and expansion features. Verify the full model name before selecting any of these resources.
Know Why the Exact Revision Matters
Motherboards that share a product family can have different hardware revisions or firmware requirements. A revision printed on the board or listed by the manufacturer may affect which BIOS file applies. This matters most when preparing a firmware update, because the wrong file can interrupt startup or leave the system unable to boot normally.
For CPU and RAM upgrades, the model alone is not always enough. Check the board manufacturer’s CPU support list, memory specifications, and BIOS notes. A compatible socket does not automatically mean every processor will work, and supported memory speeds can depend on the CPU, DIMM configuration, and firmware.
What Doesn’t Help Identify the Board Reliably
Windows Settings under System > About is useful for checking your Windows edition, processor, and device specifications, but it may show only the complete computer’s model. Device Manager is also not usually the most direct way to identify the motherboard’s exact retail product name.
Avoid choosing a BIOS file based only on the processor name, computer brand, or a similar-looking motherboard. Those details narrow the search but cannot establish the exact board identity. Confirm the model through System Information, PowerShell, firmware information, or the manufacturer’s documentation before making hardware changes.
How to Check What Motherboard You Have: Step by Step
Use the built-in Windows method first, then switch to PowerShell or firmware tools if the result is incomplete. You do not need to install software or open the computer for the first checks. The following options work for many Windows 10 and Windows 11 systems, although the information available depends on the computer’s firmware.
| Setting | Where | Effect | Risk |
| System Information | Windows + R, then msinfo32 | Shows reported baseboard manufacturer and model | Read-only; no configuration changes |
| PowerShell | Windows Terminal or PowerShell | Retrieves baseboard data through CIM | Read-only when using the command below |
| BIOS/UEFI | Firmware setup during startup | May show board or system identification | Read-only if you avoid changing settings |
| Physical label | Printed on the motherboard | Can confirm model and hardware revision | Requires opening the case safely |
Use PowerShell to Retrieve Motherboard Details
Open Start, search for PowerShell or Windows Terminal, and launch it. Enter Get-CimInstance Win32_BaseBoard and press Enter. The output may include Manufacturer, Product, Version, and SerialNumber, depending on what the firmware exposes. This method provides a convenient alternative when you prefer a copyable text result.
The command queries Windows’ Common Information Model interface; it does not change BIOS settings or modify the motherboard. If you need only the maker and model, use Get-CimInstance Win32_BaseBoard | Select-Object Manufacturer, Product, Version. Compare these fields with System Information if the reported product name seems unfamiliar.
Check BIOS or UEFI During Startup
Restart the computer and enter BIOS/UEFI using the key shown by the manufacturer. Delete and F2 are common keys on desktop motherboards, but the correct key varies by system. Some computers also provide a firmware option through Windows recovery or advanced startup, so consult the computer’s official instructions if the startup shortcut is unclear.
Look for a board name, system information page, or firmware identification screen. BIOS/UEFI does not always show the full retail motherboard model, especially on branded computers. Treat this as a cross-check rather than a reason to change settings; exit without saving if you only need to identify the hardware.
Identify the Board With CPU-Z
If Windows reports a blank or generic product name, CPU-Z is a commonly used third-party utility that can display motherboard information. Download it from the official CPUID website, launch it, and open the Mainboard tab. Check the manufacturer, model, chipset, and BIOS fields where available, then compare the results with the board maker’s support page.
CPU-Z is useful when the firmware data is incomplete, but software cannot always identify a proprietary or incorrectly reported board. Download the utility from its official source rather than a third-party download mirror. If the displayed model conflicts with other evidence, confirm it through the manufacturer’s support documentation before selecting drivers or firmware.
Read the Motherboard’s Printed Model Name
When software and firmware cannot identify the board, check the physical motherboard. Shut down the PC, switch off and unplug the power supply, and follow the computer manufacturer’s safety guidance before removing the side panel. Never handle internal components while the system is powered. A laptop may require more involved disassembly, so use its service manual or seek qualified assistance.
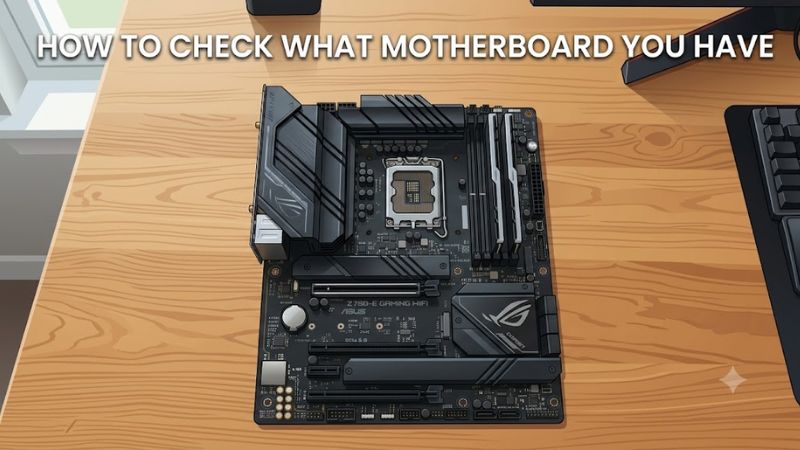
Look for a model name or product code printed directly on the board, often near the memory slots, PCIe slots, CPU socket, or board edges. Record the complete label and any revision marking. If the model is still unclear, compare the board layout and printed identifiers with the manufacturer’s official manual rather than relying on visual resemblance alone.
Verify the Motherboard Before Upgrading Your Gaming PC
Once you know how to check what motherboard you have, use the exact model to research compatibility before buying components. The motherboard’s official specifications and support pages are more useful than a model name alone: they explain supported processors, RAM, storage interfaces, expansion slots, and firmware requirements.
Check CPU Socket and Processor Support
Find the motherboard’s official CPU support list and locate your intended processor. Confirm the socket, required BIOS version, and any manufacturer notes about supported CPUs. A processor can fit the same socket as an older chip without being supported by every board in that family, so verify the exact model rather than relying on socket compatibility alone.
If a BIOS update is required, read the manufacturer’s instructions before starting. Confirm the exact board model and revision, follow the recommended update procedure, and check whether the system needs a supported older CPU or a dedicated firmware recovery feature. Do not install a BIOS file simply because its filename resembles your motherboard’s name.
Confirm RAM and Storage Compatibility
Check whether the board uses DDR4 or DDR5 memory and review the manufacturer’s supported capacity and configuration. These memory types are physically and electrically different, so a DDR5 module cannot be installed in a DDR4-only motherboard. Supported speeds also depend on the CPU’s memory controller, the DIMM arrangement, and BIOS configuration.
For storage upgrades, review the number and type of M.2 slots, supported SSD interfaces, and available SATA connections. An M.2 slot’s physical shape does not guarantee that every M.2 drive will operate in it. Consult the board manual for interface support and any shared-lane limitations that could affect other connectors.
Download the Correct Drivers and Firmware
After identifying the exact board, open the manufacturer’s official support page and select the matching product. Check the listed operating systems and download the chipset, network, audio, or other drivers you actually need. For a prebuilt computer, the system manufacturer’s support page may be the appropriate source for validated drivers and customized firmware.
Treat BIOS updates differently from routine driver installations. Read the release notes to see whether an update addresses your issue or supports the hardware you plan to install. Keep a stable power supply during the update and follow the official procedure. If the model or revision remains uncertain, resolve that uncertainty before flashing firmware.
Troubleshoot Missing or Conflicting Information
If msinfo32 and PowerShell return different or incomplete details, compare the results with BIOS/UEFI and any manufacturer documentation. A blank field or generic name does not necessarily mean the motherboard is defective; the system firmware may simply fail to provide a useful product identifier to Windows. Check whether you are looking at baseboard information rather than the computer’s system model.
For a branded desktop or laptop, search the official support site using its exact system model or service identifier. For a custom build, inspect the physical board markings if software cannot resolve the model. Once two reliable sources agree, save the full model and revision so you can use them when researching future upgrades.
FAQ
How do I check what motherboard I have without opening my PC?
You can check your motherboard without opening the PC by running msinfo32 or the PowerShell command Get-CimInstance Win32_BaseBoard. Both can display manufacturer and product information provided by the system firmware. If those values are blank or generic, try BIOS/UEFI or a utility such as CPU-Z before opening the case.
Can I find my motherboard model in Windows 11?
Yes, Windows 11 includes System Information, which you can open by pressing Windows + R, entering msinfo32, and pressing Enter. Look for BaseBoard Manufacturer and BaseBoard Product. PowerShell offers another option through Get-CimInstance Win32_BaseBoard, without requiring a separate utility.
Is my motherboard model the same as my PC model?
No, the motherboard model and PC model are not necessarily the same. The PC model identifies the complete computer, while the baseboard fields identify the motherboard as reported by the firmware. This distinction is particularly important for prebuilt systems, which may use proprietary boards or manufacturer-specific part numbers.
Why does Windows not show my motherboard model?
Windows may not show the exact motherboard model because the firmware provides incomplete or generic identification data. Try PowerShell, check BIOS/UEFI, and consult the computer manufacturer’s documentation. If these methods do not resolve the model, inspect the printed motherboard label safely or ask the system manufacturer for confirmation.
Final Thoughts
Learning how to check what motherboard you have is straightforward: start with System Information, use PowerShell for another view, and check BIOS/UEFI or the printed board label when needed. Confirm the exact model before selecting a CPU, memory kit, driver, or BIOS update, and use the manufacturer’s documentation for final compatibility decisions.
Ready to decide? Our #1 pick for 2026 is the Setting.
Live price & availability on Amazon.