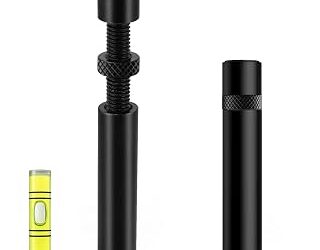
- Top Pick: acer GPU Support Bracket, GPU Stand with Magnet Non-Slip Base,(L, 70-120mm) | Adjustable Graphics Card Holder, Video Card Sag Holder Bracket Fits Most Cases, Tool-Free GPU Brace
- Best Value: California JOS GPU Support Bracket Graphics Card Brace Anti-Sag Holder Height Adjustable Video Card Stand Large(1 PCAK, Black)
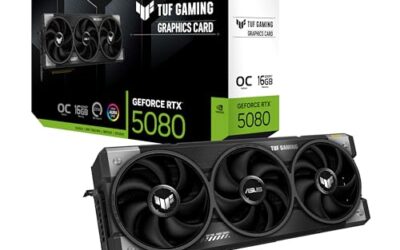
- Premium Choice: ASUS NVIDIA GeForce RTX™ 5060 LP BRK 8GB GDDR7 OC Edition Graphics Card (PCIe® 5.0, 8GB GDDR7, HDMI®/DP 2.1, Low-Profile Design, IP5X Dust Resistance), 3 Year Warranty
Pushing your gaming rig to its limits often means wrestling with heat and power consumption. While upgrading your GPU is the most direct route to more frames, there’s a powerful, often overlooked technique that can tame your existing hardware: undervolting. Undervolting your Graphics Processing Unit (GPU) involves reducing the voltage supplied to it while maintaining or even improving its performance. This can lead to lower temperatures, reduced fan noise, and potentially longer component lifespan, all without costing you a single dollar. In this guide, we’ll walk you through the process, explaining the “why” and the “how” to safely undervolt your GPU.
Whether you’re dealing with a high-end card that runs a bit too hot or a mid-range GPU struggling to keep up in demanding titles, undervolting offers a compelling solution. It’s a nuanced process, but with the right tools and a methodical approach, you can unlock a more efficient and quieter gaming experience. Let’s dive in.
As an Amazon Associate we earn from qualifying purchases at no extra cost to you.


⚡ Save on Your Next PC — Amazon Prime
Prime members get fast free shipping on the systems above, plus early access to Prime Day & Black Friday PC deals. New members get a 30-day free trial.
Watch: How to Undervolt Your GPU — Video Review
What is Undervolting and Why Do It?
Undervolting is the practice of reducing the default voltage supplied to your GPU. Graphics cards are typically set with a voltage curve that provides more power than strictly necessary to ensure stability across a wide range of silicon chips and operating conditions. By carefully lowering this voltage, you can achieve the same or very similar clock speeds at a lower power draw. This translates to several key benefits:
- Lower Temperatures: Reduced voltage means less power consumed, which directly results in less heat generated. This is crucial for sustained performance, preventing thermal throttling where your GPU slows down to prevent overheating.
- Reduced Fan Noise: With lower temperatures, your GPU fans won’t need to spin as fast or as often, leading to a significantly quieter gaming environment.
- Improved Efficiency: Less power draw means a lighter load on your power supply unit (PSU) and potentially lower electricity bills.
- Potential for Higher Sustained Clocks: In some cases, by reducing heat, you can allow your GPU to maintain higher boost clocks for longer periods.
Tools You’ll Need
Before you begin, ensure you have the necessary software to monitor your GPU’s performance and adjust its settings. The primary tool for undervolting is typically included with your GPU driver, but third-party tools offer more granular control and are often preferred.
- GPU Driver Software: NVIDIA’s GeForce Experience or AMD’s Adrenalin software often include basic performance tuning options.
- MSI Afterburner: This is the most popular and versatile free tool for GPU overclocking and undervolting. It provides an intuitive interface for adjusting core clock, memory clock, voltage, fan speed, and monitoring key metrics.
- HWiNFO64: An excellent system information and monitoring tool. It provides detailed real-time data on your GPU’s temperatures, clock speeds, power consumption, and voltage, essential for tracking your undervolting progress.
- Benchmarking Software: Tools like 3DMark, Unigine Heaven/Superposition, or even demanding games themselves are crucial for testing the stability of your undervolted settings.
The Undervolting Process: Step-by-Step
The core of undervolting lies in adjusting the voltage-frequency curve. Each GPU has a unique curve that maps specific clock speeds to corresponding voltages. We aim to find the lowest stable voltage for a desired clock speed.
- Install and Open Your Tools: Install MSI Afterburner and HWiNFO64. Open HWiNFO64 and select “Sensors-only” to monitor your GPU. Then, open MSI Afterburner.
- Access the Voltage-Frequency Curve Editor: In MSI Afterburner, press Ctrl+F to open the “Voltage/Frequency Curve” window. This graph shows the relationship between the voltage (X-axis) and the core clock speed (Y-axis).
- Identify Your Target Clock Speed: Before you start adjusting, get a baseline of your GPU’s typical boost clock under load in your favorite games or benchmarks. You’ll aim to match this or a slightly lower, more sustainable clock speed.
- Lowering the Voltage: The easiest method for beginners is to find a point on the curve that corresponds to your desired clock speed and then drag that point downwards to a lower voltage. A common starting point is to select a voltage point (e.g., 900mV) and then drag its corresponding clock speed to a stable value you observed previously (e.g., 1900MHz). Alternatively, you can flatten the curve by finding a voltage point (e.g., 1000mV) and dragging the associated clock speed to your target, then dragging all points to the right of it to the same clock speed. This effectively sets a voltage limit.
- Apply and Test: Click the “Apply” button in MSI Afterburner. Now, run your benchmarking software or a demanding game for at least 15-30 minutes. Monitor your GPU’s temperature, clock speeds, and look for any graphical artifacts or crashes.
- Iterate and Refine: If your system is stable, you can try lowering the voltage further or increasing the clock speed slightly at that voltage. If you experience crashes or artifacts, your settings are unstable. You’ll need to go back to MSI Afterburner and either increase the voltage slightly or decrease the clock speed at that voltage. Repeat the testing process until you find a stable balance.
Advanced Techniques and Considerations
Once you’re comfortable with the basic undervolting process, you can explore more advanced methods and consider other factors that influence your GPU’s performance.
- Fan Curve Tuning: Complement your undervolt by customizing your fan curve in MSI Afterburner. You can set fans to ramp up more aggressively at specific temperatures, keeping your GPU cooler and allowing for higher sustained clocks.
- Offset Voltage vs. Curve Editing: While the curve editor offers the most control, some users prefer using the “Core voltage (mV)” offset slider in MSI Afterburner. This applies a fixed voltage reduction across the entire curve. It’s simpler but less precise.
- Silicon Lottery: Remember that every GPU chip is unique. What works for one user might not work for another. Be patient and thorough in your research.
- Driver Updates: GPU driver updates can sometimes reset your undervolting profiles. You may need to reapply your settings after a driver update. Consider setting MSI Afterburner to apply settings at startup.
Tips for Success
- Start Conservatively: Don’t aim for the absolute lowest voltage immediately. Start with small voltage reductions and gradually decrease it.
- Test Thoroughly: Stability is paramount. Test with a variety of demanding applications and games to ensure your settings hold up under different loads.
- Monitor Everything: Keep a close eye on temperatures, clock speeds, and power draw using HWiNFO64 and MSI Afterburner’s on-screen display.
- Document Your Findings: Keep a record of the voltage and clock speed combinations you test, along with their stability results. This will help you track your progress and revert to known stable settings if needed.
Frequently Asked Questions
Is undervolting safe for my GPU?
Yes, undervolting is generally considered safe. Unlike overclocking, which can push components beyond their designed limits, undervolting reduces stress. The worst-case scenario for unstable undervolting is a system crash or graphical artifacting, which will simply require you to revert to stable settings.
How much can I expect to lower my GPU temperatures?
This varies significantly depending on your specific GPU model, case airflow, and the initial voltage. However, it’s common to see temperature reductions of 5-15°C. Some users have reported even more substantial improvements.
Will undervolting impact my FPS?
Ideally, no. The goal of undervolting is to maintain your current clock speeds at a lower voltage. In some cases, by preventing thermal throttling, you might even see an increase in sustained performance. If you experience a performance drop, your voltage is likely too low for the target clock speed, and you’ll need to adjust.
Do I need a GPU support bracket after undervolting?
A GPU support bracket, such as the acer GPU Support Bracket, California JOS GPU Support Bracket, or the Graphics Card GPU Brace Support, is unrelated to undervolting. These brackets are designed to prevent GPU sag, a physical issue where heavy graphics cards can bend their PCIe slot over time. Undervolting addresses thermal and power efficiency, not physical support.
Conclusion
Undervolting your GPU is a rewarding process that can significantly enhance your gaming experience by reducing heat and noise without sacrificing performance. By following these steps, utilizing the right tools, and testing methodically, you can unlock the full potential of your current hardware and enjoy a more efficient, quieter, and potentially cooler gaming rig. Happy gaming!