🛒 Best Price Today on Amazon
Prime members get fast, free shipping on everything above, plus member-only deals. New members get a 30-day free trial — cancel anytime.
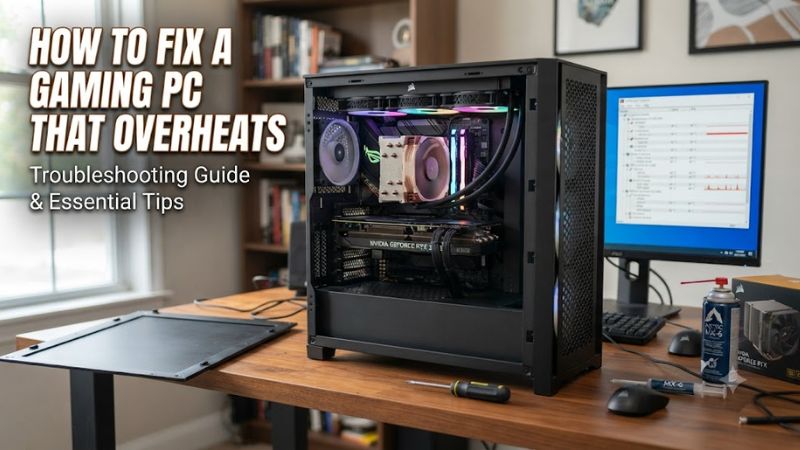
How to fix a gaming pc that overheats starts with identifying whether CPU or GPU temperature, airflow, fan behavior, or software load is responsible. Check temperatures under the same game load before changing hardware, then move from free airflow checks to settings and cooling work only when the evidence points there.
Quick answer: Our top pick in 2026 is the Step — our #1 rated choice. See the full ranked comparison, alternatives and buying advice below.
Why a Gaming PC Overheats
A gaming PC overheats when heat production exceeds what its cooler and case airflow can move away. Dust, blocked intake or exhaust paths, failed fans, an incorrectly mounted cooler, aggressive power settings, or sustained component load can all contribute. Intel also identifies throttling, excessive fan noise, reduced CPU frequency, and shutdowns as overheating symptoms.
Dust and Restricted Airflow
Dust buildup can restrict heatsink fins, fan blades, filters, and vents, reducing the amount of air moving through the cooling system. ASUS specifically notes that dust or debris blocking vents and fans can reduce cooling and cause performance problems. For a desktop, inspect front, bottom, rear, and top airflow paths before changing software settings.
Poor airflow can also come from cable routing, a blocked intake, or a case positioned against a wall or enclosed space. Intel recommends checking chassis airflow, cable obstructions, and the overall intake and exhaust direction when troubleshooting overheating. A sudden temperature increase after months of normal gaming makes airflow inspection especially relevant.
Fan or Cooler Problems
A fan that does not spin, spins intermittently, or cannot increase speed under load can leave the CPU or GPU hotter than expected. Monitor fan speed alongside temperature rather than judging by noise alone. HWiNFO provides sensor readings, while AMD Software can display GPU temperature and fan speed on supported Radeon hardware.
The CPU cooler also needs proper contact with the processor and adequate capacity for its platform. Intel recommends checking cooler compatibility and installation when throttling occurs. If the cooler was recently installed or moved, mounting pressure and the thermal interface material deserve attention before assuming the processor itself is faulty.
Ambient Heat and PC Placement
Room temperature affects the starting point for every component because the cooling system can only reject heat into the surrounding air. A tower placed inside a cramped cabinet can also restrict intake and exhaust. Move the case into an open position and leave its ventilation areas unobstructed before interpreting a temperature change as a hardware failure.
Compare the same game scene before and after changing placement, while keeping graphics settings unchanged. HWiNFO can record CPU readings, while GPU software can show GPU temperature and fan behavior. The useful signal is whether temperatures consistently change under comparable load, rather than a single peak captured at an arbitrary moment.
What Doesn’t Help
RAM cleaners, registry scripts, and disabling Windows telemetry are not meaningful cooling fixes. They do not remove dust, restore a failed fan, improve heatsink contact, or create additional case airflow, so they should not be presented as solutions to an overheating diagnosis.
Likewise, lowering every Windows setting without identifying the heat source can obscure the problem rather than solve it. Microsoft recommends monitoring resource usage and managing unnecessary background activity for performance troubleshooting, but overheating still requires checking the physical cooling path and component temperatures.
How to Fix a Gaming PC That Overheats: Step by Step
Start by recording CPU and GPU temperatures during a repeatable gaming session, then make one change at a time. HWiNFO can expose CPU and motherboard sensors, while GPU software can provide temperature and fan metrics. A useful diagnosis separates normal load-related temperature increases from sustained thermal throttling or abnormal fan behavior.
| Step | Where | How to Verify | Cost |
| 1. Clean airflow | Case, filters, fans, vents | HWiNFO/Afterburner before and after; Event Viewer for related hardware errors | Free |
| 2. Check settings and load | Windows, game, BIOS fan controls | HWiNFO/Afterburner temperatures and clocks; Event Viewer System log | Free |
| 3. Improve placement or airflow | Desk and case intake/exhaust | Repeat the same game load and compare sensor readings | Low-cost |
| 4. Inspect cooling hardware | CPU cooler, fans, thermal interface | HWiNFO/Afterburner under load; Event Viewer for WHEA errors | Varies |
Step 1: Clean the Cooling Path
Shut the PC down and disconnect power before opening the case. Remove dust from filters, vents, heatsinks, and fans using a suitable cleaning method, while preventing fans from freely spinning during cleaning. Check that every installed fan can physically rotate and that no cable is touching a blade or obstructing a heatsink.
After cleaning, repeat the same game or workload and compare the temperature trend in HWiNFO or MSI Afterburner. Event Viewer can also show hardware-related events in Windows Logs > System; Microsoft identifies Microsoft-Windows-WHEA-Logger as the provider for hardware error events. If temperatures improve, keep the cleaned configuration.
Step 2: Check Windows, Game, and Fan Settings
Look at CPU and GPU utilization while the overheating occurs. If one component is heavily loaded because of a demanding game setting, background process, or uncapped frame rate, reducing that workload can reduce heat without changing hardware. Microsoft also provides Task Manager as a way to inspect CPU and other resource usage.
For a GPU, use its supported control software to inspect temperature, power, and fan behavior. AMD Software, for example, provides performance metrics and configurable fan tuning on supported Radeon hardware. If you changed a fan curve or tuning profile, restore the previous profile or default settings if temperatures became worse afterward.
Step 3: Improve Placement and Airflow
Move the tower away from enclosed spaces and make sure intake and exhaust openings have room to breathe. Check that front or bottom intake fans are not blocked and that rear or top exhaust fans have a clear path. Do not assume that adding more fans automatically helps if existing airflow is poorly directed.
Verify the change by running the same game section at the same resolution and graphics settings. Record CPU and GPU temperature, fan speed, and clock behavior with HWiNFO or Afterburner. If the placement change helps, keep it; if it does not, return the case to its previous position and continue diagnosis rather than adding hardware immediately.
Step 4: Inspect the Cooling Hardware
If temperatures remain abnormal after airflow checks, inspect the CPU cooler mounting, fan operation, heatsink condition, and thermal interface material. Intel notes that missing or improperly applied thermal interface material can contribute to overheating. For a replacement CPU cooler, verify the CPU socket and case clearance before purchase; compatibility varies by cooler and platform.
Use HWiNFO or Afterburner during a repeatable workload and watch whether temperature rises rapidly while clocks fall or fan speed behaves unexpectedly. Check Event Viewer under Windows Logs > System for hardware errors as supporting evidence, not as proof of a thermal cause. If cooling hardware is changed, undo the change only after powering down and restoring the original compatible configuration.
FAQ: Fixing an Overheating Gaming PC
Temperature alone does not establish that a gaming PC is overheating, because modern CPUs and GPUs can run at elevated temperatures during demanding workloads. Look for sustained high readings combined with throttling, abnormal fan behavior, crashes, shutdowns, or a clear change from the system’s previous behavior. Intel lists reduced CPU frequency, throttling, excessive fan noise, and shutdowns among relevant symptoms.
Is 90°C Too Hot for a Gaming PC?
90°C is not automatically proof of a fault because the acceptable temperature depends on the specific CPU or GPU and its operating limits. Instead of applying one universal threshold, check the manufacturer’s specifications and monitor whether the component is throttling or behaving differently from its normal operating pattern.
A useful diagnosis compares temperature with utilization, clocks, fan speed, and workload. HWiNFO can expose several CPU temperature sensors, and the correct sensor label varies by processor architecture. Its author notes that different CPU families can report multiple temperature values with different meanings.
Can Dust Cause a Gaming PC to Overheat?
Dust can contribute to overheating by obstructing vents, fans, filters, and heatsink fins, so cleaning the cooling path is an appropriate early troubleshooting step. ASUS specifically identifies dust and debris blocking ventilation or fans as a possible cause of insufficient cooling and performance problems.
After cleaning, compare the same workload using the same graphics settings rather than relying on idle temperature. If HWiNFO or Afterburner shows lower sustained temperatures or less fan activity during the same workload, airflow was likely part of the issue. If nothing changes, continue to the fan, cooler, and software checks.
Can Changing Windows Settings Reduce Gaming PC Heat?
Changing Windows settings can reduce heat when unnecessary background activity or an inappropriate workload is contributing to CPU usage, but it does not repair a physical cooling problem. Microsoft provides Task Manager and Startup settings for identifying applications that consume resources in the background.
Be cautious with performance-oriented power settings because higher performance can increase power consumption and heat. Microsoft notes that its Best performance mode can make a device run warmer, particularly on laptops. For an overheating desktop, use workload reduction only when monitoring shows that excessive software load is part of the cause.
When Should I Replace a Gaming PC Cooler?
Replace a cooler when diagnosis points to inadequate cooling capacity, failed cooling hardware, damaged mounting, or a persistent thermal-interface problem after basic airflow checks. The replacement must support the CPU socket and fit the case, while the mounting system must be appropriate for that platform.
Do not replace the cooler solely because a processor becomes warm during a demanding game. First compare temperatures, clocks, utilization, and fan behavior, then check whether the cooler is installed correctly. Intel specifically recommends verifying thermal-solution compatibility and installation when CPU throttling occurs.
Final Thoughts
Knowing how to fix a gaming pc that overheats means diagnosing the heat source before buying hardware. Start with airflow and monitoring, then check workload and fan settings, improve placement, and inspect the cooler only when evidence points there. This approach keeps each change measurable and reversible.
Ready to decide? Our #1 pick for 2026 is the Step.
Live price & availability on Amazon.