Modern desktop hardware requires a systematic diagnostic strategy when unexpected system crashes, frame drops, or blue screen errors occur. A structured PC troubleshooting guide helps gamers isolate failing components without unnecessary part swaps. By verifying thermal margins, driver integrity, and power delivery, stability returns.
What PC Troubleshooting Really Comes Down To
Resolving complex desktop performance issues requires identifying root causes rather than applying random software tweaks. Most hardware instability stems from thermal throttling under heavy gaming loads, corrupted display drivers following updates, or unstable RAM speeds. Isolating these variables ensures that system stability remains high.
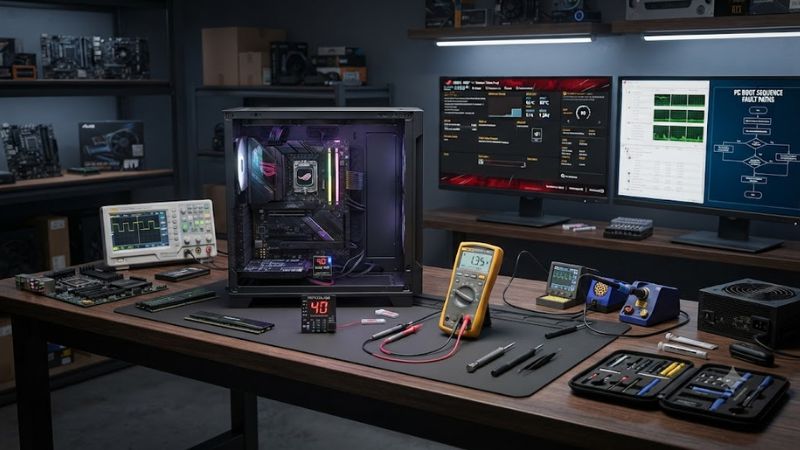
Thermal Limits and Power Delivery
Thermal management directly dictates graphics card and processor clock speeds during long gaming sessions. When a CPU exceeds 90°C or a GPU surpasses 85°C, thermal throttling drops clock frequencies instantly to prevent silicon damage, causing stutter. Monitoring temperatures using HWiNFO64 gives clear insight into fan profiles and cooling limits.
Power delivery issues manifest as instant system reboots or sudden shutdowns under heavy loads. Modern graphics cards experience transient power spikes that trigger power supply unit safety trip points if capacity is insufficient. Verifying PCIe cable connections and checking 12V rail stability in BIOS logs helps prevent sudden shutoffs.
Software Integrity and Driver Stacks
Graphics driver corruption remains a leading cause of game crashes and stuttering on Windows 11. Overwriting older display drivers with new updates often leaves residual registry entries or conflicting library files that cause DirectX crashes. Utilizing a comprehensive PC troubleshooting guide helps structure the clean installation process.
System file integrity can degrade due to improper shutdowns or interrupted Windows updates. Corrupted system files cause intermittent desktop freezing, application errors, and background service failures. Running built-in system verification commands routinely replaces damaged system binaries from local component store caches without dataloss.
Component Isolation and Memory Diagnostics
Memory instability produces random Blue Screen of Death errors with varying stop codes like IRQL_NOT_LESS_OR_EQUAL. Overclocked DDR4 or DDR5 RAM modules running on aggressive XMP or EXPO profiles can produce memory errors over time. Testing individual RAM sticks in different motherboard slots helps isolate damaged memory hardware.
Isolating hardware requires stripping a system down to its essential booting components. Disconnecting non-essential USB peripherals, secondary storage drives, and expansion cards narrows down hardware conflicts effectively. This diagnostic technique ensures that troubleshooting focuses solely on core motherboard and processing components.
What Does Not Help
Third-party RAM cleaners and automated registry boost scripts do not fix desktop performance problems or lower game latency. These tools frequently delete essential operating system keys and cause application instability without improving framerates. Relying on verified system settings yields far better reliability than automated utility suites.
Disabling Windows telemetry services or core security features does not provide measurable gaming FPS gains. Turning off background defense services exposes the operating system to malware risks while leaving real hardware bottlenecks unresolved. Troubleshooting should always focus on thermal headroom, driver health, and component stability.
How to Troubleshoot a PC: Diagnostic Method Comparison
Executing systematic diagnostic steps resolves performance bottlenecks and hardware crashes effectively. Following an established PC troubleshooting guide ensures each fix is tested in order from simple software adjustments to hardware verification. The table below compares four core corrective actions, where to apply them, their effects, and risks.
| Setting / Method | Location / Tool | Effect & Benefit | Risk & Recovery | | Clean Driver Install | DDU in Windows Safe Mode | Removes corrupted graphics driver files completely | Low; requires reconfiguring custom GPU panel settings | | System File Repair | Command Prompt (sfc /scannow) | Replaces corrupted Windows files with cached copies | None; changes can be restored via Windows Update | | Memory Diagnostics | Windows Search (mdsched.exe) | Scans physical RAM chips for memory bit errors | None; requires system reboot and 30 minutes execution | | UEFI Firmware Reset | Motherboard BIOS Menu | Restores default CPU/RAM clocks and voltage levels | Low; resets custom XMP, EXPO, and fan speed curves |
Step 1: Clean Corrupted Graphics Drivers
Removing display driver remnants prevents graphics crashes and micro-stuttering in demanding titles. Following a PC troubleshooting guide, boot Windows 11 into Safe Mode and execute Display Driver Uninstaller to wipe NVIDIA or AMD drivers. Install official drivers directly from GPU manufacturer websites after rebooting into normal mode.
To verify driver stability, run 3DMark Time Spy at 1440p High settings and monitor frametimes in MSI Afterburner. Compare the average framerate against manufacturer baseline scores for your specific graphics card model. If frametimes remain smooth without crash-to-desktop events, driver corruption has been successfully resolved on the PC.
Step 2: Repair Damaged Operating System Files
Scanning system files fixes operating system corruption caused by abrupt power loss or failed update routines. Open Command Prompt with administrative privileges by right-clicking the Start button. Type sfc /scannow and press Enter to initiate a full scan of protected system binaries and repair any corrupted Windows system files automatically.
Check Event Viewer under Windows Logs Application to verify that system file repairs completed without ongoing errors. If System File Checker reports unfixable corruption, run DISM /Online /Cleanup-Image /RestoreHealth in Command Prompt. This command downloads fresh system files directly from Windows Update servers to restore full system integrity.
Step 3: Verify RAM Module Stability
Testing memory modules identifies hidden memory bit errors that trigger random desktop crashes. Press Windows Key + R, type mdsched.exe, and select the option to restart immediately. Windows Memory Diagnostic will run automatically upon reboot, testing system RAM across multiple algorithm passes before loading back into the desktop environment.
Review the diagnostic results in Event Viewer under System logs by filtering for the MemoryDiagnostics-Results event source. If errors are detected, enter the motherboard BIOS and disable XMP or EXPO memory profiles to test modules at stock SPD frequencies. Re-test individual memory sticks to identify whether a specific RAM slot or module failed.
Step 4: Reset Motherboard BIOS Firmware
Resetting BIOS settings removes unstable CPU overclocks, incorrect RAM timings, and voltage misconfigurations. Turn off the PC, disconnect the main power cable from the power supply, and press the power button to discharge residual electricity. Remove the CR2032 coin battery from the motherboard for five minutes before reinserting it carefully.
Consulting a PC troubleshooting guide helps step through entering the UEFI motherboard menu upon power up. Press the Delete or F2 key during startup to enter setup and select Load Optimized Defaults. Save settings and exit to ensure the desktop boots with factory default power targets and baseline fan curves for maximum system stability.
Frequently Asked Questions
Addressing common hardware and software questions helps clear up confusion during system repairs. This section provides direct answers to typical desktop issues that PC gamers encounter during build maintenance. Reviewing these concise diagnostic solutions allows you to quickly pinpoint motherboard, power supply, and display issues.
How do you diagnose a PC that turns on but gives no display output?
Reseating the graphics card, RAM modules, and display cables resolves most no-display scenarios immediately. Verify that the HDMI or DisplayPort cable is connected directly to the GPU output rather than the motherboard video ports. Check motherboard diagnostic LEDs or beep codes to determine if CPU, DRAM, or VGA initialization failed on boot.
If diagnostic LEDs highlight a DRAM error, remove all memory sticks and reinsert a single module into slot A2. Power on the system and wait up to two minutes for memory training to complete. Testing each RAM stick individually isolates whether a broken memory module or faulty motherboard memory channel prevents display output initialization.
Why does a gaming desktop freeze randomly during heavy gameplay sessions?
Random gaming freezes are primarily caused by thermal throttling, insufficient GPU power delivery, or memory instability. Monitor processor and graphics card temperatures during heavy gaming using HWiNFO64 to check thermal limits. Clean dust from cooling heatsinks and intake fan filters if component temperatures consistently exceed 85°C under load.
Power supply degradation can also cause freezes when the GPU demands maximum power during complex rendered scenes. Check that dedicated PCIe power cables from the power supply are connected to the graphics card rather than daisychained splitters. Following a reliable PC troubleshooting guide helps structure testing under synthetic benchmark loads.
When should you reapply thermal paste to a CPU cooler heatsink?
Reapply thermal paste every three to five years or whenever CPU operating temperatures rise abnormally under load. Over time, thermal compound dries out, creating microscopic air pockets between the processor heat spreader and cooler cold plate. Removing the cooler, cleaning old paste with isopropyl alcohol, and applying fresh paste drops temperatures.
Verify cooling improvements by running Cinebench R23 multi-core stress tests while logging CPU package temperatures in HWiNFO64. Standard desktop processors should maintain temperatures below 85°C under sustained full-core workload loops. Lower CPU operating temperatures prevent thermal throttling and maintain higher sustained boost clock frequencies.
How can you identify if a computer power supply unit is failing?
A failing power supply unit causes sudden computer shutdowns under load, unexpected reboot loops, or electrical whining noises. When power supply voltage regulation degrades, the 12V rail drops below ATX specifications under heavy gaming demands. Testing the PC under a combined CPU and GPU stress test in OCCT confirms power supply power instability.
If the system powers off instantly without displaying a Windows blue screen error, the power supply trip protection activated. Replace suspicious power supplies with an 80 PLUS Gold certified unit matching your hardware wattage requirements. Utilizing a structured PC troubleshooting guide simplifies identifying whether the PSU or motherboard caused shutoffs.
Final Thoughts
Following a methodical diagnostic sequence saves time and prevents unnecessary hardware purchases when resolving desktop issues. Utilizing a structured PC troubleshooting guide allows gamers to identify driver corruption, thermal throttling, and memory errors systematically. Regular system maintenance ensures sustained performance and long-term component reliability.