🛒 Best Price Today on Amazon
Prime members get fast, free shipping on everything above, plus member-only deals. New members get a 30-day free trial — cancel anytime.
Building a custom PC requires precise planning to maintain optimal airflow inside the chassis. Following a proper cable management guide helps streamline internal wiring, reducing dust accumulation and component temperatures. Routing power cables behind the motherboard tray keeps the primary chamber clear for maximum ventilation.
What Cable Management Really Comes Down To
Effective cable management inside a computer case relies on core principles of spatial organization and component accessibility. Organizing internal wires prevents interference with cooling fans and simplifies future hardware upgrades. Understanding structural layout, connector clearance, and tie-down locations creates a reliable setup.
Chassis Clearance and Cutouts
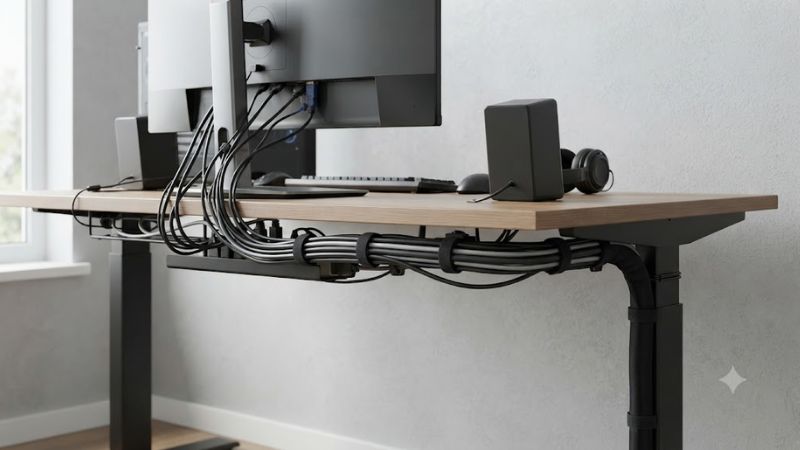
Modern PC enclosures feature cutouts strategically positioned around the perimeter of the motherboard tray. Rubber grommets over these openings conceal excess wire lengths while protecting insulation from sharp steel edges. Utilizing these channels ensures power lines travel the shortest distance from the power supply unit.
Sufficient clearance behind the motherboard tray is critical when routing thick main power cables. Standard mid-tower cases offer between 15mm and 25mm of rear depth for cable storage. Selecting a chassis with ample rear depth allows side panels to close smoothly without putting unnecessary pressure on connector housings.
Cable Tension and Bend Radiuses
Excessive tension on internal power wires creates strain on motherboard headers and expansion cards. High-current connections require natural sweeping curves rather than sharp right-angle bends near the terminal plugs. Maintaining gradual cable bends prevents terminal pin displacement within the plastic connector housings.
High-power graphics card connectors like the 12V-2×6 and 12VHPWR demand at least 35mm of straight clearance before any initial bend. Standard 16AWG conductors require loose grouping to prevent thermal buildup inside dense wire bundles. Following specific clearance recommendations prevents connector melting during high loads.
Fasteners and Anchorage
Securing loose wiring requires reusable fasteners attached to structural tie points built into the chassis. Reusable hook-and-loop straps provide holding force while allowing easy adjustments during maintenance. Utilizing built-in cable management features creates distinct pathways for main power and front panel cables.
Zip ties offer a permanent hold for thick fixed bundles, but plastic edges can cut into soft wire sleeving if tightened excessively. Plastic cable combs hold parallel wires flat across open spans, maintaining clean visual alignments behind glass panels. Combining straps with combs ensures clean organization throughout.
What Does Not Help Airflow
A common misconception is that bundling every wire tightly together improves system cooling performance. Test data indicates that internal airflow remains identical whether cables are meticulously tied or loosely bundled behind the motherboard tray. Clean cable placement primarily improves working space during component swaps.
Excessive use of rigid plastic zip ties can restrict wire flex and damage delicate signal lines for front panel audio and USB headers. Oversized custom extension cables add unnecessary bulk into the lower power supply shroud, crowding drive bays and blocking intake fan airflow paths near the bottom of the computer chassis.
How to Cable Manage Your PC: Step by Step
Executing an organized cable management guide workflow requires following a logical sequence before installing large components. Routing primary power leads prior to mounting large graphics cards or CPU air coolers prevents physical obstruction. Implementing a structured process saves installation time and stress.
| Setting | Where | Effect | Risk | | EPS Routing | Top chassis cutout | Clean CPU power path | Socket clip snag | | 24-Pin ATX | Right motherboard tray | Direct PSU connection | Stiff wire tension | | GPU Power | Lower grommet slot | Clear fan shroud area | Tight bend radius | | Tie Anchoring | Rear tray channel | Secured wire bundles | Excess bundle pinch |
Pre-Routing CPU and Board Power
Before securing the motherboard inside the chassis, route the 8-pin EPS CPU power cable through the upper left cutout. Accessing this top corner becomes difficult once large heatsinks or top-mounted liquid cooling radiators are installed. Pre-routing this cable prevents awkward hand positioning in tight clearance zones.
Next, pass the primary 24-pin ATX power cable through the central rubber grommet adjacent to the main power socket. Connect the plug firmly into the motherboard header until the plastic retention latch engages completely. Keeping this thick cable flat against the rear tray leaves room for secondary fan controller cables.
Routing Graphics Card Power
Pass the dedicated graphics card power leads through the lower chassis cutout located directly above the power supply shroud. Using an inclusive cable management guide methodology, route the 12V-2×6 or PCIe cables with enough slack to reach the GPU power socket without applying downward leverage on the expansion slot.
Ensure the power connector snaps securely into the graphics card header with zero visible gap between the mating plastic housings. Allow at least 35mm of straight wire protrusion from the GPU plug before establishing a smooth bend toward the side panel. This alignment prevents uneven pin contact and localized overheating.
Managing Front Panel and Storage Cables
Group front panel I/O wires, USB headers, and HD audio leads into a single thin bundle along the bottom edge of the motherboard. Pass these small cables through the bottom cutouts, keeping them separate from high-current power lines. Bundling low-voltage signal lines independently minimizes visual clutter inside the case.
Route SATA data cables and addressable RGB control wires along secondary tray channels using small hook-and-loop straps. Avoid forcing sharp 90-degree bends in thin SATA data lines, as internal conductor breakage can cause drive detection errors. Keeping storage wiring flat ensures drive trays remain easily accessible for upgrades.
Securing and Bundling the Rear Tray
Gather all excess cable length inside the lower power supply basement, storing unused modular cables outside the chassis entirely. Anchor main cable trunks to the built-in tray bridge points using soft fabric fasteners. Separating power cables from signal lines creates an organized layout that simplifies future component swaps.
Inspect the completed rear panel routing to ensure no thick cable overlaps exceed the depth of the side panel alignment rails. Test the side panel fit by sliding it closed without force; any resistance indicates a bunched cable bundle that requires flattening. Proper distribution prevents panel bowing and preserves structural integrity.
Frequently Asked Questions About Cable Management
Addressing questions regarding internal cable management helps builders balance aesthetics with practical component safety. Understanding optimal fastener selection, cable extension safety, and airflow impact simplifies the assembly process. Below are answers to frequent builder inquiries regarding proper chassis wiring practices.
Does Cable Management Affect PC Performance?
Proper cable management does not directly increase frame rates or processor clock speeds during standard gaming workloads. Routing wires properly prevents cables from obstructing fan blades, ensuring cooling systems maintain proper airflow through heat sinks. Preventing thermal throttling helps hardware sustain clock speeds.
A comprehensive cable management guide emphasizes that unobstructed ventilation paths maintain lower internal ambient temperatures. System stability remains consistent when components operate within normal operating thermal limits. Clean internal layouts also make diagnostic troubleshooting and routine dust removal faster.
Are Velcro Straps Better Than Zip Ties?
Velcro straps are superior to plastic zip ties for securing internal computer wiring in modern setups. Hook-and-loop fasteners allow quick adjustments when adding or replacing components without requiring cutting tools near delicate cables. They also distribute clamping pressure evenly, preventing damage to soft wire insulation.
Zip ties remain useful for securing dense, permanent wiring trunks along the outer perimeter of the chassis frame. However, over-tightened zip ties can pinch thin signal wires and leave sharp plastic edges when trimmed. Using reusable fabric straps provides a safer and more flexible solution for custom desktop builds.
Are Custom Cable Extensions Safe to Use?
Custom cable extensions are safe when purchased from reputable manufacturers using proper 16AWG or 18AWG copper conductors. Extensions plug directly into standard power supply cables, adding length for improved appearance in glass cases. Verifying tight terminal fits ensures stable power delivery without voltage drops.
Never mix modular cables from different power supply brands, as internal pinouts vary between manufacturers despite identical connector shapes. Using incorrect modular cables causes electrical shorts and hardware damage. Extensions avoid pinout mismatches because they utilize universal ATX specification standard male-to-female plugs.
How Much Space Is Needed Behind the Motherboard Tray?
A minimum clearance of 20mm behind the motherboard tray is recommended for convenient cable management options. Modern mid-tower enclosures provide between 18mm and 30mm of rear depth, accommodating thick 24-pin ATX power cables effortlessly. Sufficient rear space allows side panels to close flush without forcing wires tight.
Compact cases with less than 15mm of rear depth require flat, ribbon-style cables or custom short length cable sets. Planing wire paths along outer recessed channels prevents bulges against the side panel. Adequate clearance ensures air circulates around drive bays while keeping all power connections mechanically secure.
Final Thoughts
Mastering PC wiring improves system organization and simplifies hardware upgrades throughout the life of your computer. Following a structured cable management guide ensures clean airflow pathways while protecting delicate high-current connectors. Investing time in proper cable routing yields a professional build that is easy to service.