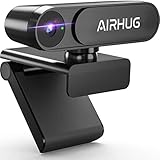
- Top Pick: AIRHUG 2K Webcam No Mic with Privacy Cover, USB Camera for Computer
- Best Value: Cyber Acoustics 1080p Full HD Webcam (WC-1000), Designed with No Microphone for Use with Headsets and Speakerphones, Autofocus, Low-Light Correction, USB-A Plug and Play
- Premium Choice: Logitech Brio 101 Full HD 1080p Webcam for Streaming and Meetings – Black
It might seem odd to want a webcam with no microphone, but for many setups it’s exactly the right call. If you already use a quality headset, dedicated mic, or speakerphone, a mic-free webcam avoids audio conflicts, echo, and the software confusion of multiple input devices, while often costing less too.
- Watch: Webcam Without Microphone — Video Review
- Design & Build
- Performance
- Pros & Cons
- Alternatives to Consider
- Step-by-Step: Setting Up a Webcam Without a Microphone
- How Much USB Bandwidth Does Video Need?
- Common Mistakes
- Troubleshooting
- Placement and Lighting Matter More Than Sensor Size
- Pairing a Mic-Free Webcam With Your Audio
- Match Resolution to What You Actually Do
- Pre-Purchase Checklist
- Privacy Checks for Any Webcam
- Related Guides
- Related Guides
- Frequently Asked Questions
- Verdict
- Related Articles
Whether you want a camera that genuinely lacks a mic or one where the mic can be disabled, here’s how to choose and which models deliver clean, reliable video without the audio baggage.
As an Amazon Associate we earn from qualifying purchases at no extra cost to you.




🎮 Get More From Your Setup — Free
Prime Gaming gives you free PC games every month, in-game loot, and a free Twitch channel sub — plus fast free shipping on all the gear above. New members get a 30-day free trial.
Watch: Webcam Without Microphone — Video Review
Design & Build
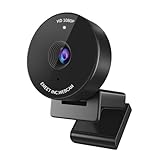
These cameras favor clean, functional designs with privacy in mind. The AIRHUG 2K and 4K models and the Cyber Acoustics WC-1000 are purpose-built without microphones and include physical privacy covers, ideal for security-conscious users and professional environments. Others like the Logitech Brio 101, C920e, and EMEET C950 are standard webcams where the microphone is either certified-disabled or easily switched off in software. Build quality is solid across the range, with sturdy clips that grip monitors and laptops securely.
Performance
Video quality is the whole point here, and these deliver. The AIRHUG 4K and Logitech Brio 101 produce crisp, detailed images with good color, while the Cyber Acoustics WC-1000 adds autofocus and low-light correction that keep you looking sharp in less-than-ideal lighting. Because there’s no active mic (or it’s disabled), your dedicated audio device handles sound cleanly with no risk of the webcam grabbing focus as the default input. For anyone plagued by echo or double-audio issues on calls, that reliability is a genuine relief.
Pros & Cons
- No audio conflicts: your headset or dedicated mic handles sound cleanly.
- Privacy focus: many include physical covers and no listening hardware.
- Sharp video: 1080p to 4K options with autofocus and low-light help.
- Often cheaper: dropping the mic can lower the price.
- Needs separate audio: you must already have a mic or headset.
- Fewer all-in-one options: true mic-free models are less common.
- Check the spec: some are mic-disabled rather than mic-free.
Alternatives to Consider
For a genuinely mic-free camera with privacy covers, the AIRHUG 2K or 4K and the Cyber Acoustics WC-1000 are the purpose-built picks. If you want premium video and don’t mind a disabled or unused mic, the Logitech Brio 101 offers excellent quality, while the C920e is a proven, certified option for corporate use. The EMEET C950 suits those who want a physical cover and the flexibility to toggle audio.
Step-by-Step: Setting Up a Webcam Without a Microphone
A mic-free webcam only delivers video, so the setup is really two separate jobs: connect the camera, then tell your meeting software where the sound comes from. Following the order below prevents most beginner problems.
- Plug the webcam into a direct USB port. Use a port on the computer itself rather than an unpowered hub, and prefer a USB 3.0 port when the camera supports it.
- Let the system install the driver. Most webcams work through the built-in class driver, so they appear in the camera list within seconds.
- Allow camera access. On Windows, open Settings, then Privacy & security, then Camera, and make sure apps are permitted to use it.
- Pick the camera in your call app. Zoom, Teams and Google Meet each have a video settings menu where the camera is chosen.
- Select your audio input separately. Choose your headset, desk microphone or speakerphone in the same settings screen, and do the same under System, Sound, Input.
- Run a short check. Record a few seconds of video, play it back, and confirm picture, framing and sound before a real meeting.
How Much USB Bandwidth Does Video Need?
Resolution and frame rate decide how much data the camera pushes down the cable. The figures below are approximate, for uncompressed 4:2:2 video at 16 bits per pixel; many webcams compress the video inside the camera to cut this, but the numbers show why a weak port or hub can cause stutter.
| Resolution and frame rate | Approximate raw data rate | USB 2.0 (480 Mbps) | USB 3.0 (5 Gbps) |
|---|---|---|---|
| 720p at 30 fps | About 440 Mbps | Borderline | Comfortable |
| 1080p at 30 fps | About 1 Gbps | Needs compression | Comfortable |
| 1080p at 60 fps | About 2 Gbps | Needs compression | Comfortable |
| 4K at 30 fps | About 4 Gbps | Not possible raw | Tight |
Common Mistakes
- Choosing the wrong audio device. Meeting apps sometimes pick the laptop microphone automatically, so guests hear a distant, echoey voice instead of the headset.
- Buying a mic-free camera and forgetting the audio plan. Without a headset or desk mic, no one will hear you at all.
- Using speakers with an open microphone. Sound from the speakers feeds back into the mic and creates echo, so headphones are the cleaner option.
- Judging picture quality in poor light. Dim rooms push the camera to slow its exposure, which lowers frame rate and adds noise.
Troubleshooting
The Camera Is Not Detected
Try a different USB port, avoid unpowered hubs, and close other apps that might have opened the camera, since only one program can usually control it at a time. Also check the privacy setting mentioned above.
Video Is Choppy or Low Quality
Lower the resolution or frame rate in the call app, move the camera to a USB 3.0 port, and add a lamp in front of you rather than behind. Brighter light lets the camera keep a smooth frame rate.
Participants Cannot Hear You
Open the app’s audio settings and confirm the intended microphone is selected, the input level is not muted, and the operating system has allowed microphone access to that app. The camera itself will never supply sound.
The Picture Flickers
Many cameras include a power-line frequency option, usually 50 Hz or 60 Hz. Match it to your region’s mains supply, which is 60 Hz in North America, to stop flicker under artificial lighting.
Placement and Lighting Matter More Than Sensor Size
A modest camera in good light usually beats a premium sensor in a dim room, because small webcam sensors lean on light to keep noise and motion blur down. Work through these positions before blaming the hardware.
- Set the lens at eye level or slightly above. A camera that sits below the chin tilts the face upward and exaggerates shadows.
- Put the main light in front of you. A window or desk lamp placed behind the monitor lights your face evenly; one behind you turns you into a silhouette.
- Soften the source. Bounce a lamp off a wall or use a diffused bulb so one side of the face is not far brighter than the other.
- Sit about an arm’s length away. That framing shows head and shoulders and keeps autofocus from hunting.
- Leave auto exposure on first. Switch to manual settings in the camera software only if the image still pumps brighter and darker.
Dim rooms also push many cameras to drop their frame rate to gather more light, which is a common cause of choppy video even when the USB connection is fine.
Pairing a Mic-Free Webcam With Your Audio
Removing the built-in mic only helps if the replacement audio path is clean. The table below compares the usual options.
| Audio source | Best for | Watch out for |
|---|---|---|
| Headset with boom mic | Meetings, gaming, shared rooms | Selecting the headset mic, not the laptop mic, in each app |
| Desk USB microphone | Streaming, recording, voice work | Picking up keyboard noise and speaker output |
| Speakerphone | Small group calls in one room | Echo if another device is also open on the call |
| Monitor or laptop speakers with built-in mic | Occasional casual calls | Feedback loops, because speaker sound re-enters the mic |
Whichever you choose, only one microphone should be active in a call. Duplicate inputs are the usual source of echo and of the “participants cannot hear you” complaint.
Match Resolution to What You Actually Do
- Everyday video calls: 1080p is plenty. Conferencing apps often compress or downscale outgoing video depending on plan and settings, so extra sensor resolution mostly helps when you crop or record.
- Streaming and recording: a higher resolution such as the 2K class gives room to crop in editing, and a steady frame rate matters more than peak pixel count.
- Background-heavy rooms: a wider field of view fits more of the room, which is a drawback when you would rather keep the space behind you private.
Pre-Purchase Checklist
- Driver-free operation: look for UVC (USB Video Class) support, which lets Windows, macOS, and Linux recognize the camera without a vendor driver.
- Cable and port: confirm whether the cable is fixed or detachable and whether it is USB-A or USB-C, so it reaches your port without an adapter.
- Mounting: a monitor clip suits most desks, while a standard tripod thread lets you place the camera higher on an arm or stand.
- Focus type: fixed focus is simpler and consistent at arm’s length; autofocus helps if you hold objects up to the lens.
- Cable length: measure the run from the PC to the monitor top, since stretching a short cable strains the connector.
Privacy Checks for Any Webcam
A camera with no microphone removes one privacy concern, but the lens is still live. Use a physical shutter or slide cover when the camera is idle, and confirm in your operating system’s camera privacy settings which applications are allowed to open it. If an app cannot find the device, that same permission list is a good first place to look before reinstalling anything.
Related Guides
- Best Gaming Microphones with RGB (2026)
- Gaming Wireless Headset With Microphone (2026)
- Best Gaming Microphone PC (2026)
- Gaming Headphones With Microphone Wireless (2026)
- Best Gaming Microphone Best Buy (2026)
Frequently Asked Questions
Why buy a webcam without a microphone?
To avoid audio conflicts and echo when you already use a headset or dedicated mic. It also enhances privacy and can reduce cost.
Will my calls still have audio?
Yes, as long as you have another audio input like a headset, standalone mic, or speakerphone. The webcam simply handles video only.
What’s the difference between mic-free and mic-disabled?
Mic-free cameras have no microphone hardware at all, while mic-disabled models include one that’s turned off, either by certification or in software.
Do these support high resolution?
Absolutely. Options range from crisp 1080p like the Logitech Brio 101 to detailed 4K like the AIRHUG UHD model.
Verdict
A mic-free webcam is the clean, conflict-free choice when your audio is already handled. The AIRHUG 4K and Cyber Acoustics WC-1000 lead for true mic-free operation with privacy covers, while the Logitech Brio 101 is the pick if you want premium video and simply won’t use the mic. Match it to your existing audio setup and enjoy hassle-free calls.