🛒 Best Price Today on Amazon
Prime members get fast, free shipping on everything above, plus member-only deals. New members get a 30-day free trial — cancel anytime.
- Likely Causes
- Fix 1: Re-enable XMP or EXPO in BIOS
- Fix 2: Increase or manually size the page file
- Fix 3: Set Windows to High Performance power plan
- Fix 4: Disable memory integrity (VBS)
- Fix 5: Re-enable Resizable BAR and Above 4G Decoding
- Fix 6: Clear shader and pipeline caches
- Fix 7: Run Windows Memory Diagnostic and test modules individually
- If Nothing Works
- FAQ
- Related Guides
- Top Pick: 10.2" 8 Core 4+64GB Car Radio Stereo for 2013-2018 Dodge Ram 1500 2500 3500, Upgrade Plug and Play Android 13 Head Unit with Wireless Carplay/Android Auto/1080P Backup Camera/AM FM
- Best Value: 10.2" 64GB Car Radio Stereo for 2019-2024 Dodge Ram 1500 2500 3500 (Mamual A/C), Upgrade Plug and Play Android 13 Head Unit with Wireless Carplay/Android Auto/AM FM
- Premium Choice: Cidava 13 Inch Car Radio for Dodge RAM 2014-2018 and 2019-2024 RAM Classic
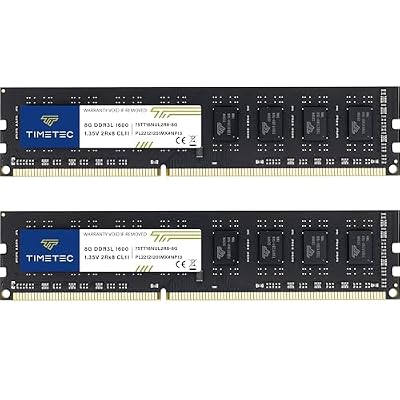
You just added a fresh pair of DDR5 modules, swapped into a new motherboard, or topped off to 64 GB, and now your games are stuttering in ways they never stuttered before. This is not a coincidence and it is almost never a hardware defect. When a RAM upgrade introduces frame-time spikes, you are looking at one of three failure modes: the system is falling back to single-channel operation, a critical BIOS or OS setting was silently reset to a safe default during the hardware change, or Windows memory management is thrashing because it does not know what it is working with anymore.
The symptom profile is distinctive. You get micro-stutter during camera pans in Unreal Engine 5 titles, intermittent freezes in DX12 games that rely on large memory mappings, or sudden frame-time spikes every 30 to 60 seconds that look like the game is “catching its breath.” These are not GPU or CPU problems. They are memory subsystem problems, and they are almost always fixable in under an hour.
As an Amazon Associate we earn from qualifying purchases at no extra cost to you.




Likely Causes
| Cause | How to confirm | Fix difficulty |
|---|---|---|
| XMP/EXPO profile lost after BIOS reset | CPU-Z shows RAM running at JEDEC base (4800 MT/s) instead of rated speed | Low |
| Page file undersized or managed | Task Manager shows commit charge exceeding physical RAM | Low |
| Power plan reverted to Balanced | powercfg /getactivescheme returns “Balanced” |
Low |
| Memory integrity (VBS) re-enabled by BIOS reset | Windows Security shows Core isolation enabled | Low |
| Resizable BAR / Above 4G Decoding disabled | NVIDIA Control Panel or GPU-Z shows BAR size at 256 MB | Medium |
| Corrupted or stale shader caches | Stuttering during first 10-20 min of gameplay, not after | Medium |
| Mixed kit timings or channel imbalance | Windows Memory Diagnostic reports errors, or single-module test improves | Medium |
| Loose contact or slot misplacement | System detects less RAM than installed; BIOS shows 1 of 2 modules | Medium |
| BIOS memory training failure at high density | Random freezes, WHEA_UNCORRECTABLE_ERROR, or boot failures |
High |
Fix 1: Re-enable XMP or EXPO in BIOS
How to check
Open CPU-Z and go to the Memory tab. If the DRAM Frequency is 2400 MHz (effective 4800 MT/s) on DDR5 that is rated for 6000+ MT/s, your XMP/EXPO profile is off. A BIOS reset triggered by pulling RAM often reverts to JEDEC defaults.
What to do
Reboot into BIOS (Del or F2). Find the profile selector: ASUS labels it “Ai Overclock Tuner” or “A-XMP,” MSI uses “X.M.P.,” Gigabyte calls it “Extreme Memory Profile,” and AM5 boards may say “EXPO.” Select the profile matching your kit’s rated speed and save with F10. Let the system retrain.
How to undo it
Load BIOS defaults (typically F5 or “Load Optimized Defaults”) to revert to JEDEC. XMP/EXPO profiles are stored in SPD data on the module and persist independently of BIOS settings.
Fix 2: Increase or manually size the page file
How to check
Open Task Manager, go to the Performance tab, select Memory. If “Committed” exceeds your physical RAM by a large margin during gameplay, Windows is paging heavily despite your upgrade.
What to do
Right-click This PC, select Properties, Advanced system settings, Performance Settings, Advanced, Virtual memory, Change. Uncheck “Automatically manage paging file size for all drives.” Set a custom size of 1.5x your physical RAM on the drive where C:\pagefile.sys resides. Restart.
How to undo it
Re-check “Automatically manage paging file size” and restart. Windows will recreate a system-managed pagefile.sys.
Fix 3: Set Windows to High Performance power plan
How to check
Open an elevated Command Prompt and run powercfg /getactivescheme. If it returns a GUID ending in “8698” that maps to “Balanced,” your CPU may be entering deeper sleep states between frames.
What to do
Run powercfg -duplicatescheme e9a4ab79-224f-4f69-8124-bb4018727a93 to restore the hidden High Performance plan if it is missing, then set it with powercfg /setactive and the GUID shown. In NVIDIA Control Panel, set Power Management Mode to “Prefer Maximum Performance” globally.
How to undo it
Switch back to Balanced with powercfg /setactive 381b4222-f694-41f0-9685-ff5bb260df2e.
Fix 4: Disable memory integrity (VBS)
How to check
Go to Settings, Privacy & Security, Windows Security, Device Security, Core isolation details. Memory integrity is often re-enabled by a BIOS update or hardware change.
What to do
Toggle Memory integrity off. Restart. This disables HVCI and Virtualization-Based Security, which add measurable overhead to memory-mapped I/O operations and can introduce 2-5% frame-time variance in CPU-bound scenarios.
How to undo it
Re-enable the toggle and restart. No other system changes are affected.
Fix 5: Re-enable Resizable BAR and Above 4G Decoding
How to check
Open GPU-Z and look at the “Bus Interface” section. If BAR size shows 256 MB instead of your GPU’s full VRAM capacity (e.g., 12288 MB), Resizable BAR is off.
What to do
In BIOS, enable “Above 4G Decoding” and “Re-Size BAR Support” (AMD boards may call it “Smart Access Memory”). Save and reboot. Verify in GPU-Z and NVIDIA Control Panel under System Information.
How to undo it
Disable both options in BIOS. The system will revert to legacy 256 MB BAR mapping.
Fix 6: Clear shader and pipeline caches
How to check
If stuttering is worst during the first session after the upgrade and diminishes over repeated play, stale caches compiled under different memory geometry are the cause.
What to do
Delete the contents of %LOCALAPPDATA%\NVIDIA\DXCache, %LOCALAPPDATA%\NVIDIA\GLCache, and %LOCALAPPDATA%\D3DSCache. For Steam, right-click the game, Properties, Installed Files, and verify integrity. For UE5 titles specifically, delete %LOCALAPPDATA%\[GameName]\Saved\Config\Windows\Engine.ini to force shader pipeline rebuild.
How to undo it
Caches regenerate automatically. There is nothing to restore; the system will rebuild them on next launch.
Fix 7: Run Windows Memory Diagnostic and test modules individually
How to check
Run mdsched.exe from an elevated prompt. If it reports errors, or if you suspect a mixed kit, boot with only one module in slot A2 (the primary DIMM slot per most motherboard manuals) and test for stutter.
What to do
If single-module is clean, install modules in slots A2 and B2 (dual-channel pair positions). Confirm in CPU-Z that Channel Mode reads “Dual” not “Single.” If you added a second kit to existing modules, remove the older kit entirely; mismatched tCL/tRCD/tRP values force the controller to run at the slowest common denominator with poor interleaving.
How to undo it
Reinstall all modules. If the problem recurs, you are working with an unsupported density/timing combination and should revert to a single matched kit.
If Nothing Works
At this point you are dealing with one of two scenarios: a marginal memory training failure at your installed density and speed, or a defective module. Lower your XMP/EXPO profile to the next speed bin (e.g., drop from 6400 to 6000 MT/s) and test. If stability returns but performance does not, the issue is not speed but timing. Manually increase tRCD or tRP by one or two steps in BIOS. Run MemTest86 from a bootable USB for four or more passes on each module individually. Any error is grounds for RMA. In 2026 the AM5 and LGA1851 memory controllers handle higher densities far better than early-gen DDR5 boards did, but 64 GB kits at 7200+ MT/s remain at the edge of validation for many BIOS revisions.
FAQ
Does more RAM always help gaming performance?
No. Beyond 32 GB, most games see diminishing returns. A RAM upgrade that introduces stutter is a net negative; the issue is always configuration, not capacity.
Why did adding RAM reset my BIOS settings?
The memory controller needs to retrain on hardware change. If the system fails to POST with existing overclock settings, it auto-reverts to defaults. This silently disables XMP, power plan optimizations, and sometimes VBS.
Can mismatched RAM kits cause permanent damage?
No damage, but they can cause persistent instability, boot failures, and the type of micro-stutter described here because the controller must negotiate timings dynamically.
Will a Windows reinstall fix RAM-related stutter?
Almost never. If stutter appeared immediately after a hardware change and no software was modified, the cause is in BIOS, memory configuration, or physical installation. A reinstall addresses software corruption, not hardware settings.