🛒 Best Price Today on Amazon
Prime members get fast, free shipping on everything above, plus member-only deals. New members get a 30-day free trial — cancel anytime.
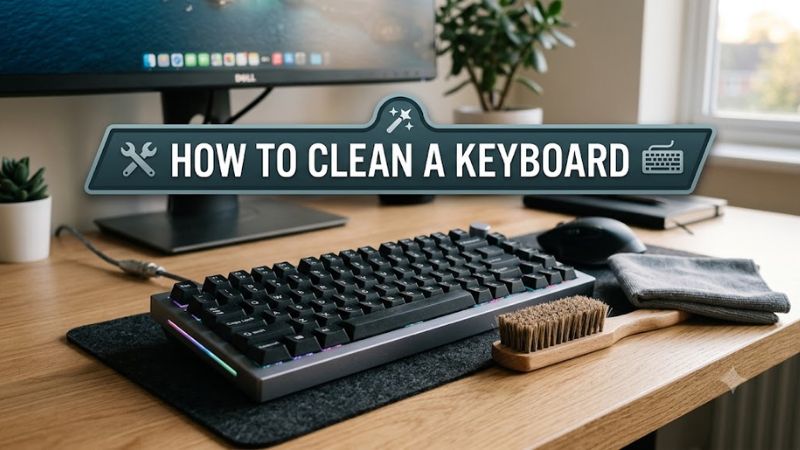
How to clean a keyboard starts with powering it off, removing loose debris, and wiping the key surfaces without letting moisture reach the electronics. The right approach depends on whether you have a desktop mechanical keyboard, a membrane model, or a laptop keyboard. A few careful steps can remove dust and grime while reducing the risk of damage.
Quick answer: Our top pick in 2026 is the Setting — our #1 rated choice. See the full ranked comparison, alternatives and buying advice below.
What Keyboard Cleaning Really Comes Down To
The safest approach is to start with dry cleaning and use minimal moisture only when necessary. Disconnect a wired keyboard or switch off a wireless model and remove replaceable batteries. For a laptop, shut down the entire computer and unplug its charger. Manufacturer guidance from Microsoft and Logitech also warns against applying liquids directly to devices.
Identify Your Keyboard Before Cleaning
A mechanical keyboard usually has individual switches beneath its keycaps, and some models allow those caps to be removed for deeper cleaning. Membrane keyboards use a different internal structure, so removing their caps may be less straightforward. Laptop keyboards often use compact scissor mechanisms that can break if a cap is pulled off incorrectly.
Before deciding how to clean a keyboard, check the manufacturer’s maintenance instructions for your exact model. Look for guidance on removable keycaps, approved cleaning solutions, and any water-resistance limitations. A removable keycap does not mean the entire keyboard can be washed, and a splash-resistant design does not necessarily permit immersion.
Gather the Right Cleaning Supplies
A clean microfiber cloth, a soft brush, and compressed air are useful for routine maintenance. Cotton swabs can help reach the edges of individual keys, while a keycap puller can make removing compatible mechanical keycaps easier. Keep a dry towel nearby for removed caps, and prepare a well-lit workspace so small components remain visible.
Avoid abrasive pads, bleach, acetone, and strong household solvents that can damage finishes or printed legends. Cleaning slime and gel products may also leave residue or press debris farther into gaps. You do not need a specialized gaming accessory to remove ordinary dust; simple, suitable tools are usually enough for regular upkeep.
Protect the Electronics First
Unplug the keyboard from the computer before cleaning it. If it uses a wireless connection, switch it off and remove replaceable batteries when the manufacturer recommends doing so. For a laptop, complete a shutdown rather than relying on sleep mode, disconnect external power, and keep liquids away from openings around the keys.
Do not spray a cleaning solution onto the keyboard itself. Instead, apply an appropriate amount to a cloth or swab, following the manufacturer’s instructions, and make sure it is not dripping. Even a small quantity of liquid can migrate beneath a keycap, reach a circuit board, and cause problems that a surface wipe cannot fix.
Know What Doesn’t Help
Aggressive shaking, forceful scrubbing, and pulling off unfamiliar keycaps can cause more trouble than ordinary dust. A full-sized household vacuum can also create risks through excessive suction or contact, so use a method specifically suitable for electronics if vacuuming is recommended. Avoid heat guns and hot-air dryers, which may deform plastic components.
There is no need to disassemble a keyboard just because its key surfaces look dirty. Begin with the least invasive method and inspect the result before moving to a deeper clean. If a key remains unresponsive after surface debris is removed, the cause could involve a damaged switch, a liquid spill, or an electrical fault rather than dirt alone.
How to Clean a Keyboard: Step by Step
Work from dry debris removal to careful surface cleaning, and only remove keycaps when the keyboard design supports it. The following sequence applies to common desktop and laptop keyboards, with deeper cleaning reserved for compatible desktop models. Manufacturer-specific instructions take priority whenever they differ from these general steps.
| Setting | Where | Effect | Risk |
| Power off and disconnect | USB cable, wireless switch, or laptop power menu | Reduces electrical and accidental input risks | Cleaning while connected can cause unintended inputs or damage |
| Remove loose debris | Between keys and around the keyboard edges | Clears dust, crumbs, and loose particles | Forceful shaking can damage the device |
| Wipe key surfaces | Keycaps and outer case | Removes fingerprints and surface grime | Excess moisture can enter the keyboard |
| Remove compatible keycaps | Supported desktop keyboards only | Improves access to trapped debris | Fragile clips or stabilizers can break |
Step 1: Remove Loose Dust and Crumbs
Turn off the device and disconnect its power before beginning. Hold a desktop keyboard at an angle or upside down, then tap it gently so loose crumbs can fall out. Avoid striking the desk or shaking the keyboard forcefully, particularly if it has delicate components or a history of liquid exposure.
Use compressed air in short bursts to dislodge particles between the keys, following the can’s safety instructions and keeping it upright when directed. Work across the rows so debris can escape instead of collecting elsewhere. If you do not have compressed air, a clean, soft brush can loosen surface dust without introducing moisture.
Step 2: Wipe the Keycaps and Outer Case
Use a soft microfiber cloth to remove loose dust and fingerprints from the key surfaces. If grime remains, lightly dampen the cloth with a cleaning solution approved for the particular keyboard. Microsoft permits an isopropyl alcohol solution of 70% or less for its compatible accessories, while Logitech provides its own device-specific cleaning guidance.
Apply liquid to the cloth rather than directly to the hardware, and make sure the cloth cannot drip into the spaces around the keys. Gently wipe the keycaps, edges, and outer case without pressing hard on the mechanisms. Use a barely damp cotton swab for narrow gaps, keeping it away from openings where moisture could collect.
Step 3: Clean Between the Keys
If surface wiping leaves visible debris, use a soft brush to loosen particles along the sides of the keycaps. Combine this with gentle air bursts when appropriate, directing loosened debris out of the keyboard. Avoid inserting metal tools, toothpicks, or other rigid objects between keys because they can scratch surfaces or damage internal parts.
For stubborn residue, first check the manufacturer’s recommended cleaning method. Do not assume that alcohol is suitable for every plastic, coating, printed legend, or switch. Use only a small amount of an approved solution on a cloth or swab, and stop if the material begins to discolor or the finish changes.
Step 4: Remove Keycaps Only When Supported
On a compatible mechanical desktop keyboard, take a photograph of the layout before using a keycap puller to remove the caps. Pull each cap gently and evenly, and do not force a key that resists. Larger keys, such as the spacebar and Shift, may use stabilizers that require extra care during removal and reinstallation.
Clean removed keycaps separately using the manufacturer’s approved method, then allow them to dry completely before putting them back. Do not soak the keyboard body, switches, or circuit board. Laptop keycaps are especially easy to damage, so keep them in place unless the laptop manufacturer explicitly documents a safe removal procedure.
Frequently Asked Questions
How often should you clean a keyboard?
Clean your keyboard whenever dust, crumbs, or visible grime accumulate, with a quick surface clean as part of regular maintenance. How often a deeper clean is necessary depends on how frequently you use the keyboard, whether you eat at your desk, and how dusty your environment is.
A weekly visual check can help you decide when to remove debris, while occasional surface wiping handles fingerprints and oils. There is no universal schedule for every model, and frequent disassembly is unnecessary if ordinary cleaning keeps the keys clean and responsive.
Can you use isopropyl alcohol to clean a keyboard?
Yes, isopropyl alcohol can be suitable for some keyboards, but you should follow the manufacturer’s instructions for your specific model. Microsoft, for example, permits an isopropyl alcohol solution of 70% or less on compatible accessories, so recommendations should not be generalized to every brand or material.
Apply the approved solution sparingly to a lint-free cloth or cotton swab, never directly to the keyboard. Avoid soaking keycaps or switches, and allow all cleaned surfaces to dry before reconnecting power. If the manufacturer does not approve alcohol for a particular finish, use its recommended alternative.
How do you clean a laptop keyboard without damaging it?
Shut down the laptop, disconnect the charger, remove loose debris gently, and wipe the key surfaces with a suitable microfiber cloth. Use compressed air carefully if appropriate for the model, and follow the manufacturer’s instructions about nozzle distance and spraying technique.
Do not remove laptop keycaps simply to reach trapped dirt, because their small clips and scissor mechanisms can break. Keep moisture away from openings, and let the surface dry before restarting the computer. If a key remains stuck, consult the laptop manufacturer’s repair guidance rather than forcing it.
What should you do if liquid spills onto your keyboard?
Disconnect power immediately if it is safe to do so, and switch off the device. For a laptop, unplug the charger and do not continue using the computer to see whether it still works. If the spill involves a powered device and you cannot disconnect it safely, avoid touching wet electrical connections.
Do not rely on wiping the surface or waiting a few minutes to make a spill harmless. Keep the device powered off and seek model-specific repair advice, especially if liquid entered the keyboard. Sticky keys, unexpected inputs, or corrosion may appear later, even when the exterior looks dry.
Final Thoughts
Knowing how to clean a keyboard safely means using the least invasive method that removes the dirt. Disconnect power, clear loose debris, wipe surfaces with minimal approved moisture, and reserve keycap removal for compatible desktop models. Avoid soaking electronics or forcing fragile laptop keys, and consult manufacturer guidance when grime or spills require deeper attention.
Ready to decide? Our #1 pick for 2026 is the Setting.
Live price & availability on Amazon.