🛒 Best Price Today on Amazon
Prime members get fast, free shipping on everything above, plus member-only deals. New members get a 30-day free trial — cancel anytime.
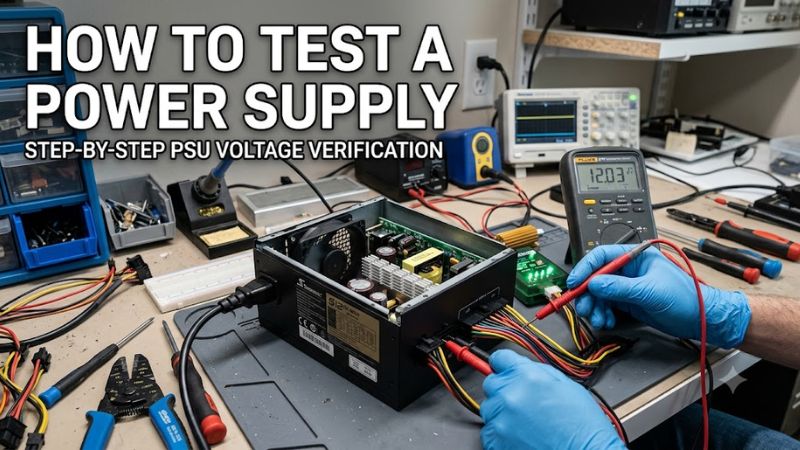
A failing power supply unit (PSU) can cause startup failures, unexpected shutdowns, or instability during gaming. Learning how to test a power supply helps you distinguish a suspected electrical fault from problems with the motherboard, graphics card, or power connections. Start with external checks, then choose a suitable diagnostic method based on your experience and symptoms.
Quick answer: Our top pick in 2026 is the Setting — our #1 rated choice. See the full ranked comparison, alternatives and buying advice below.
What Testing a Power Supply Really Comes Down To
Testing a PSU means checking whether it starts, supplies appropriate voltages, and operates reliably under the conditions your PC demands. A basic startup check cannot establish full electrical health. For a gaming desktop, combine symptom checks with suitable measurements, and avoid replacing components until the evidence points toward a specific fault.
Recognize the warning signs
A computer that shows no lights or fan activity may have a power delivery problem, but the wall outlet, power cord, case switch, and motherboard can produce similar symptoms. Random restarts, shutdowns during demanding games, or a system that fails when the graphics card draws more power can also justify investigating the PSU.
Listen for unusual electrical buzzing or clicking, and stop using the computer if you notice a burning smell, smoke, or visible damage. These signs warrant immediate disconnection from mains power when it is safe to do so. Do not repeatedly restart a system that may have an electrical fault.
Understand what each test can establish
The jumper method checks whether a compatible PSU can start when its power-on signal is activated. A dedicated PSU tester checks selected connector voltages and, depending on the device, additional signals. A digital multimeter provides individual voltage readings but requires careful probe placement and an understanding of the connector pinout.
None of these basic checks alone establishes that a power supply can deliver its rated output reliably during demanding gaming sessions. A unit may start normally yet become unstable under load, or show acceptable unloaded voltages while developing a problem during operation. Choose the method according to the question you need answered.
Prepare the computer and work area
Before learning how to test a power supply, shut down the PC, switch the PSU off, and disconnect its AC power cord before touching internal connections. Work on a dry, stable surface, keep loose metal objects away from connectors, and consult the PSU manufacturer’s instructions for the exact model and cable layout.
Never remove the PSU’s metal cover. Internal capacitors can retain dangerous electrical energy after the unit is unplugged. If the computer remains under warranty, contact the manufacturer before disassembling it. For a modular PSU, use only cables approved for that exact unit or explicitly confirmed compatible by its manufacturer; similar-looking connectors are not necessarily wired alike.
What doesn’t help
Fan movement alone is not proof of healthy power delivery, and a stationary fan does not automatically mean the PSU has failed. Many models use zero-RPM or semi-passive cooling modes that stop the fan at low temperatures or loads. Check the manual for the unit’s fan behavior before drawing conclusions from its appearance.
Software monitoring can reveal symptoms, but ordinary motherboard voltage sensors are not a substitute for proper electrical measurements. Likewise, changing Windows settings or replacing unrelated components cannot confirm a faulty PSU. Record the symptoms and the circumstances in which they occur, then select a diagnostic method that addresses the suspected problem.
How to Test a Power Supply: Step by Step
Choose the least invasive method that answers your question. Check the outlet and power cable first, then use a dedicated PSU tester or an appropriate multimeter if you need electrical readings. A jumper check is an optional diagnostic step for compatible desktop ATX units, not a substitute for measuring output or checking behavior under load.
| Setting | Where | Effect | Risk |
| External power check | Wall outlet, AC cord, rear PSU switch | Rules out basic power delivery issues | Low; do not use damaged cables |
| Jumper check | Compatible 24-pin ATX connector | Checks whether the PSU starts | Incorrect pin selection can cause damage |
| Voltage measurement | PSU output connectors | Checks individual DC voltage rails | Probe slips can short adjacent pins |
| Load assessment | Assembled PC or professional test equipment | Investigates instability under demand | Live measurements require electrical expertise |
Step 1: Check the external power source
Before you open the case, confirm that the power outlet works with a suitable device and that the AC cable is firmly connected. Check that the PSU’s rear switch is set to its on position, marked with a vertical line. If the system uses a surge protector or UPS, verify that the device is powered and functioning normally.
If the PC remains unresponsive, shut it down from the outlet before inspecting internal connections. Look for a loose motherboard power connector or CPU power cable, but do not reconnect anything while the system is energized. If you are unsure about a connection or the computer is under warranty, request manufacturer assistance.
Step 2: Perform a compatible jumper check
A jumper check can help determine how to test a power supply that appears completely dead. With the AC cord disconnected and the PSU switched off, isolate the PSU from the PC according to its manufacturer’s instructions. On a compatible standard ATX 24-pin connector, the PS_ON signal is pin 16 and ground is pin 17; connector orientation matters.
Use the manufacturer’s specified jumper tool and pin diagram rather than guessing from connector position or wire color. Keep the PSU disconnected while fitting the jumper, and make sure it cannot touch adjacent pins or metal surfaces. Reconnect power only after the setup is secure. If you cannot identify the correct pins confidently, stop and use a dedicated tester or professional service.
Step 3: Check voltage with a dedicated tester or multimeter
A dedicated PSU tester is often easier for beginners because it accepts compatible power connectors and displays selected readings directly. Follow its instructions and the PSU manual, since connector support and additional signal checks vary by device. Disconnect AC power before attaching or removing any leads, and never force a connector into the tester.
A multimeter can provide more direct readings, but only if you understand DC voltage measurement and the correct pinout. Select the meter’s DC voltage mode, use the appropriate voltage input sockets, and keep the probes from bridging adjacent contacts. If you are unfamiliar with electrical measurements, avoid probing an energized connector and choose a dedicated tester or qualified technician instead.
Step 4: Interpret the readings and investigate under load
Compare measured outputs with the specification applicable to your PSU and its ATX revision. Intel’s ATX 3.0 design guide lists nominal +12 V, +5 V, and +3.3 V rails, with the permitted range depending on the rail and operating conditions. Do not assume every revision has identical tolerances, or that a single reading captures every possible fault.
If the readings are acceptable but the PC still shuts down during gaming, the next question is whether the supply remains stable under realistic demand. A basic jumper check and unloaded meter reading cannot establish that. A technician can use appropriate load equipment to investigate regulation and ripple, while also checking the GPU, motherboard, cooling, and power connections for other causes.
Frequently Asked Questions
Can I test a power supply without connecting it to a motherboard?
Yes, a compatible desktop ATX PSU can be checked independently using a suitable jumper or dedicated PSU tester. A jumper check activates the power-on signal without relying on the motherboard, but it cannot confirm that every voltage rail is correct or that the PSU can deliver its rated power.
Disconnect the PSU from the computer before setting up the check, and follow the manufacturer’s pinout instructions. Do not apply this procedure to a proprietary power supply unless its documentation explicitly supports it. If the unit fails to start, confirm the setup and fan-control behavior before deciding that replacement is necessary.
Does a spinning PSU fan mean the power supply is healthy?
No, a spinning fan only indicates that the PSU has responded in some way, not that its electrical outputs are healthy. A power supply can start while producing an incorrect voltage or developing instability when the CPU and GPU draw more power.
Some models also stop their fans at low loads, so fan movement is not a reliable standalone pass-or-fail indicator. Use voltage measurements or suitable diagnostic equipment when you need stronger evidence about the unit’s condition.
What voltage readings should a PC power supply produce?
A standard ATX PSU provides nominal +12 V, +5 V, and +3.3 V outputs, with permitted tolerances defined by the applicable specification. For example, Intel’s ATX 3.0 guide specifies +5 V and +3.3 V ranges of ±5%, while its +12 V range allows a different lower limit.
Always consult the correct specification for your PSU and avoid treating readings from motherboard monitoring software as definitive electrical measurements. If a rail falls outside its applicable limits, stop using the system and seek qualified diagnosis before replacing parts or reconnecting the supply.
When should I replace a suspected faulty power supply?
Replace a PSU when reliable diagnosis identifies an electrical fault, or have the manufacturer or a qualified technician assess it when the evidence remains uncertain. A burning smell, smoke, visible damage, or abnormal electrical noise warrants immediate shutdown and disconnection when safe.
If the unit is still covered by warranty, contact the manufacturer before opening the case or attempting repairs. When replacement is necessary, verify the required wattage, physical dimensions, connector types, and cable compatibility with your motherboard and graphics card before purchasing another unit.
Final Thoughts
Knowing how to test a power supply helps you narrow down startup failures and gaming instability without replacing hardware unnecessarily. Begin with external checks, use a suitable jumper or tester when appropriate, and interpret voltage readings against the correct specification. If symptoms persist under load, seek a more comprehensive electrical diagnosis before choosing a replacement.
Ready to decide? Our #1 pick for 2026 is the Setting.
Live price & availability on Amazon.