🛒 Best Price Today on Amazon
Prime members get fast, free shipping on everything above, plus member-only deals. New members get a 30-day free trial — cancel anytime.
- Likely Causes
- Fix 1: Switch to High Performance Power Plan
- Fix 2: Perform a Clean GPU Driver Reinstall
- Fix 3: Verify Game File Integrity in Your Launcher
- Fix 4: Disable Overlays and Background GPU Consumers
- Fix 5: Force the Discrete GPU as Primary Renderer
- Fix 6: Monitor Thermals and Adjust Fan Curves
- Fix 7: Check BIOS Memory and PCIe Configuration
- Fix 8: Reinstall Windows or Perform a System File Check
- If Nothing Works
- FAQ
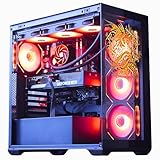
- Top Pick: KOTIN Prebuilt Gaming PC RTX 5070 12GB, Ryzen 7 9700X, 32GB DDR5, 1TB SSD
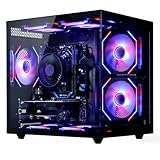
- Best Value: Skytech Gaming Archangel 5 Gaming PC, AMD Ryzen 7 7700 3.8GHz, NVIDIA RTX 5060, 1TB NVMe SSD, 32GB DDR5 RAM 6000, 750W Gold PSU, Wi-Fi, Win 11, Desktop
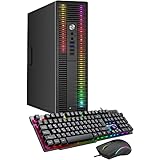
- Premium Choice: CyberPowerPC Gaming PC, Intel Core i5-14400F, GeForce RTX 5060 8GB
When a gaming PC underperforms, the symptom rarely presents as a clean “low FPS” number. More often you see frame-time spikes, inconsistent pacing during combat sequences, or a game that looks smooth in menus but drops to a slideshow the moment particle effects fire. These patterns point to specific bottlenecks: thermal throttling on the CPU or GPU, a power plan silently capping clocks, a misbehaving driver layer, or the game engine falling back to software rendering without you knowing. Engines like Unreal Engine 5 handle this differently than id Tech 7 or the Frostbite engine. Before you start swapping components, work through the checks below in order. Many of these take under five minutes and resolve what appears to be a hardware problem without touching a screwdriver.
Likely Causes
| Cause | How to confirm | Fix difficulty |
|---|---|---|
| Power plan set to Balanced or a laptop throttling to battery-saver behavior | Open powercfg /batteryreport in Admin CMD; check current GPU clock in MSI Afterburner overlay during load |
Low |
| Stale or corrupted GPU driver | Event Viewer shows nvlddmkm or amdkmdag warnings under System logs |
Low |
| Missing or corrupted game files | Launcher “Verify integrity” reports mismatches; crash log references missing .pak or .uasset files |
Low |
| Background processes consuming GPU/CPU | Resource Monitor shows non-game processes with GPU utilization above 2% | Medium |
| Windows Game Bar or overlay conflict | Disabling overlay in Settings > Gaming > Xbox Game Bar changes frame pacing noticeably | Low |
| Thermal throttling | HWiNFO64 shows CPU package or GPU hotspot exceeding 95°C with clock drops within seconds | High |
| GPU not assigned as primary renderer | dxdiag shows Microsoft Basic Render Driver instead of your discrete GPU under Display devices |
Medium |
| BIOS settings limiting PCIe lane width or XMP disabled | GPU-Z shows x8 instead of x16; CPU-Z reports memory at JEDEC default rather than rated speed | High |
Fix 1: Switch to High Performance Power Plan
How to check
Open an elevated Command Prompt and run powercfg /getactivescheme. If the output references a GUID ending in “8610ec” or “381b4222” without a “High performance” label, your system may be downclocking the GPU during transient loads. Also check Settings > System > Power > Power mode on Windows 11.
As an Amazon Associate we earn from qualifying purchases at no extra cost to you.




What to do
Run powercfg /setactive 8c5e7fda-e8bf-4a96-9a85-a6e23a8c635c to force High Performance. On laptops, additionally plug in the charger and set the OEM power utility (such as Lenovo Vantage or ASUS Armoury Crate) to “Performance” or “Turbo” mode rather than “Balanced.” Restart after applying.
How to undo it
Open Settings > System > Power and Battery > Power mode and select Balanced, or run powercfg /setactive 381b4222-f694-41f0-9685-ff5bb260df2e for the default scheme.
Fix 2: Perform a Clean GPU Driver Reinstall
How to check
Open Device Manager and expand Display adapters. Right-click your GPU, select Properties > Driver, and note the driver version and date. Compare against the latest on NVIDIA’s or AMD’s download page. If you recently updated via Windows Update rather than the manufacturer installer, you likely have a generic WHQL build without the latest game-specific optimizations.
What to do
Download the latest driver installer from the manufacturer. During installation, select “Custom” and check “Perform a clean install” (NVIDIA) or “Factory Reset” (AMD). For stubborn installs, use DDU (Display Driver Uninstaller) in Safe Mode to remove all remnants before reinstalling. After installing, restart once.
How to undo it
Roll back via Device Manager: right-click GPU > Properties > Driver > Roll Back Driver. Or use DDU again and install the previously known-good version.
Fix 3: Verify Game File Integrity in Your Launcher
How to check
In Steam, right-click the game > Properties > Installed Files > Verify integrity of game files. In Epic Games Store, click the three-dot menu next to the game and select Verify. In Battle.net, click the gear icon > Scan and Repair. If the tool reports missing or mismatched files, corruption is confirmed.
What to do
Let the verification complete and download any replaced files. For Steam games, also check that the game is installed on an SSD rather than a HDD by looking at the drive letter under the game’s properties > Local Files > Browse. Navigate to steamapps/common/ on that drive to confirm the install location.
How to undo it
No action needed. Verification only replaces broken files; it does not alter working ones.
Fix 4: Disable Overlays and Background GPU Consumers
How to check
Open Task Manager and click the “GPU” column to sort by utilization. If Discord, Steam, GeForce Experience, or Xbox Game Bar shows non-zero GPU usage while gaming, they are competing for resources.
What to do
Disable Steam Overlay: right-click game in library > Properties > General > toggle off “Enable the Steam Overlay while in-game.” Disable Discord’s overlay in User Settings > Game Overlay > toggle off “Enable in-game overlay.” On Windows 11, go to Settings > Gaming > Xbox Game Bar and turn it off. Also disable hardware-accelerated GPU scheduling if you see micro-stutter: Settings > System > Display > Graphics > Change default graphics settings > toggle off.
How to undo it
Re-enable each toggle in the same location where you disabled it.
Fix 5: Force the Discrete GPU as Primary Renderer
How to check
Run dxdiag from Win+R. Under the Display tab, confirm your discrete GPU appears as “Device Name.” If it shows “Microsoft Basic Render Driver” or only an integrated GPU, Windows is rendering games on the iGPU.
What to do
Go to Settings > System > Display > Graphics. Click “Browse” and add the game’s executable (found under steamapps/common/GameName/ for Steam titles). Set its preference to “High performance” and ensure it targets the discrete GPU by name. Additionally, in NVIDIA Control Panel > Manage 3D Settings > Program Settings, select the game and set “Power management mode” to “Prefer maximum performance” and “Preferred graphics processor” to “High-performance NVIDIA processor.”
How to undo it
Set the preference back to “Let Windows decide” in the same Graphics settings page.
Fix 6: Monitor Thermals and Adjust Fan Curves
How to check
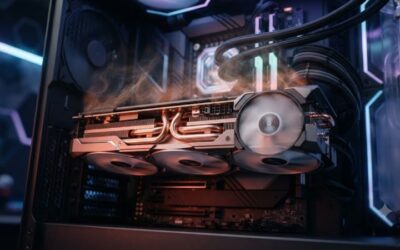
Run HWiNFO64 in Sensors-only mode alongside your game. Watch “CPU Package” and “GPU Temperature” columns. If either crosses 90–95°C and you see a sudden clock drop of 300 MHz or more, thermal throttling is your bottleneck.
What to do
For desktops, enter BIOS (press DEL or F2 during boot) and navigate to the hardware monitor or fan control section. Switch the CPU fan curve from “Silent” to “Turbo” or “Performance.” If temperatures still run high, clean dust from heatsink fins with compressed air and reapply thermal paste. For laptops, elevate the rear edge to improve airflow and consider a cooling pad as a supplementary measure.
How to undo it
Return fan curves to “Standard” or “Silent” in BIOS. No permanent hardware changes occur from adjusting fan profiles.
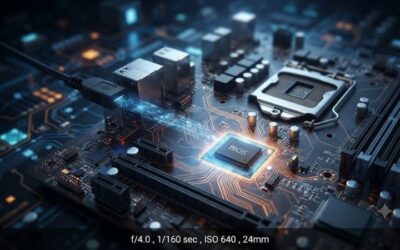
Fix 7: Check BIOS Memory and PCIe Configuration
How to check
Open CPU-Z and check the “Memory” tab. If DRAM Frequency shows half your rated speed minus a large margin, XMP/EXPO is disabled. Open GPU-Z and look at “Bus Interface” under the Graphics Card tab. If it reads “x8 @ x8” under load rather than “x16 @ x16,” your PCIe slot or riser is limiting bandwidth.
What to do
Enter BIOS and enable XMP (Intel) or EXPO/DOCP (AMD) for your RAM profile. Save and reboot. Verify stability with MemTest86 or OCCT for at least one hour. For PCIe, reseat the GPU into the top x16 slot directly on the motherboard, removing any riser cable. Update BIOS to the latest version from your motherboard manufacturer’s support page.
How to undo it
Return to BIOS and disable the XMP/EXPO profile. For BIOS updates, some boards offer “BIOS Flashback” with a previous version USB stick; otherwise, clear CMOS to restore defaults.
Fix 8: Reinstall Windows or Perform a System File Check
How to check
Open an elevated Command Prompt and run sfc /scannow followed by DISM /Online /Cleanup-Image /RestoreHealth. If SFC reports “Windows Resource Protection found corrupt files and successfully repaired them” but performance remains poor, deeper system corruption or a misconfigured service may be at fault.
What to do
After running both commands and restarting, test again. If results are unchanged, perform a reset of Windows via Settings > System > Recovery > Reset this PC > Keep my files. As a last resort, a clean install from a USB created with the Windows Media Creation Tool gives you a known-good baseline. The 2026 release of Windows 11 has made some driver scheduling changes that interact poorly with older chipset drivers, so after any reinstall, install your motherboard chipset driver before any GPU driver.
How to undo it
You cannot undo a clean install, so back up game saves from C:\Users\YourName\Documents\My Games\ and C:\Users\YourName\AppData\Local\ directories before proceeding.
If Nothing Works
At this stage the issue is almost certainly hardware. Test the GPU in another system to rule out a failing VRAM chip. Run a stress test with OCCT or FurMark and watch for artifacts, crashes, or error codes like “VIDEO_TDR_FAILURE” (stop code 0x00000116) in Event Viewer, which indicate driver-to-hardware communication failure. If the GPU checks out, test RAM slots individually by removing all but one stick and rotating through them. A single faulty DIMM can cause micro-stutter in games that heavily stream assets. If the system is more than five years old and you have a mechanical drive, the most common remaining culprit is simply the storage bottleneck on modern engines.
FAQ
Why does my game run fine in benchmarks but stutter in actual gameplay?
Benchmarks use pre-recorded sequences with predictable asset loading. Real gameplay triggers dynamic streaming, physics, and AI that can spike CPU usage or expose storage latency. Use the built-in frametime graph in tools like CapFrameX to compare the two scenarios.
Should I disable HAGS (Hardware-Accelerated GPU Scheduling)?
Not universally. HAGS improves performance in some DX12 titles and worsens frame pacing in others. Toggle it and test with a frametime capture rather than an average FPS number. If you see increased 1% lows after disabling it, leave it off.
My FPS is fine but the game feels unresponsive. Is this the same problem?
No. That is input latency, not throughput. Check for a mismatched frame cap, VSync settings (especially “Adaptive VSync” in NVIDIA Control Panel), and whether a high-refresh monitor is set below its native refresh rate in Windows Display Settings > Advanced display.
Can a failing power supply cause underperformance rather than crashes?
Yes. A PSU with degraded 12V rails may not supply sufficient transient current, causing the GPU to clock down to stay within a safe power envelope. If you see GPU power draw consistently below the card’s TDP specification in MSI Afterburner while clocks are also reduced, test with a known-good PSU if possible.
Top picks from this guide
 The Horizon PcsThe Horizon Autherium Dragon RGB I9 RTX Gaming PC ||…$3,200 \xc2\xb7 99/100
 sueverysuevery Gaming PC Desktop Computer Ryzen 5,16GB DDR4 512G SSD,…$532 \xc2\xb7 96/100
 STGAubronSTGAubron Gaming PC Desktop,Core I5,RX 550 4G,16G RAM,512G SSD |…$420 \xc2\xb7 96/100
 LenovoLenovo Legion Tower 5i – AI-Powered Gaming PC - Intel®…$2,483 \xc2\xb7 95/100